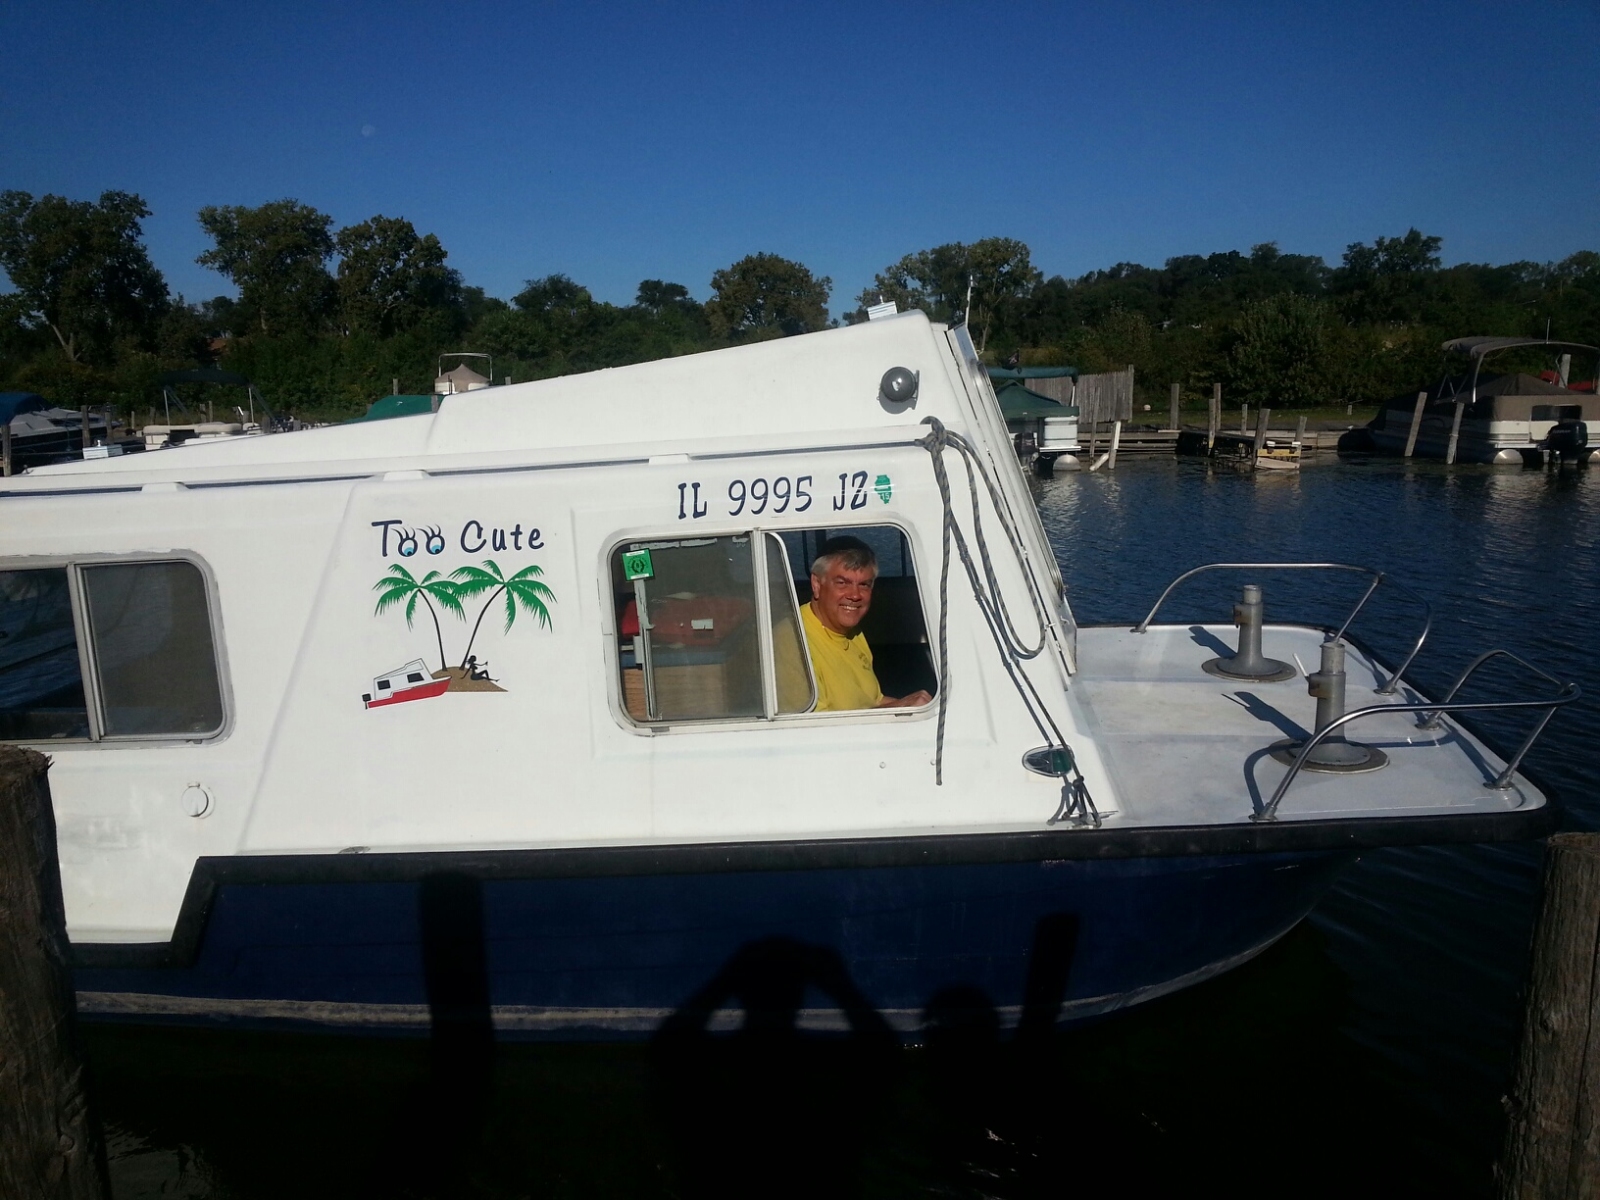
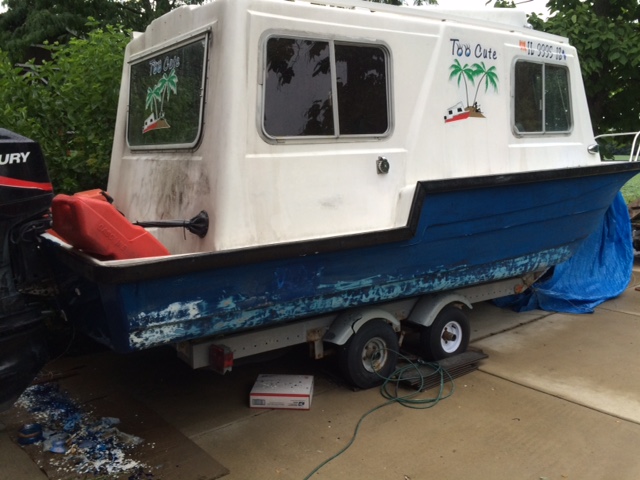
Too Cute – Third Time Around
Update
February 13, 2023
Too Cute is one of three similar Hobos on the Chain of Lakes, each with history and stories that would keep the internet going for years.
We have had a blast with it for the first year (actually starting in August 2013) so the boating season was short, pulling it in November.
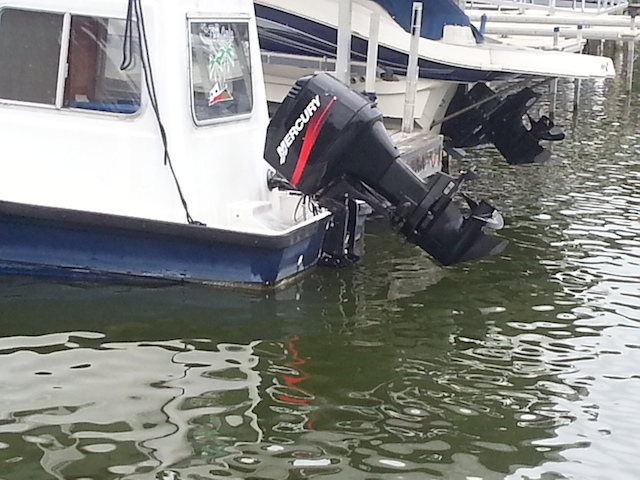
Some exhaust fumes coming from the engine led me to taking it to a local boat shop to repair the lower part of the 90HP Johnson it came with. Communications between the owner of the boat repair place and his tech were not good. The tech did not remove the lower part of the drive, but instead took the entire engine apart, and that forced me to buy a (new to me) 2004 90HP Mercury. I am probably better off now but somewhat of an unexpected purchase. In the end, I do believe I am more of a Merc guy though as my other boat has a Merc 5.0 and I feel comfortable working on it “under the hood.”
A
bit about Hobo boats. Almost every manufacturer that built them (I
believe) went bankrupt. Most seem to be a one-off venture so
everything seemed to be hand built. Good for the owners but bad for a
manufacturer that wants to mass-produce them.
Each was hand crafted with love and you can see that almost everywhere. There are not too many of these left anymore. I am trying to find out how many are left now.
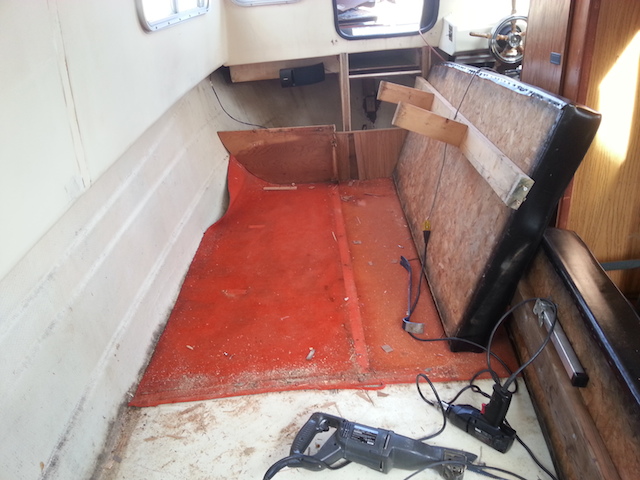
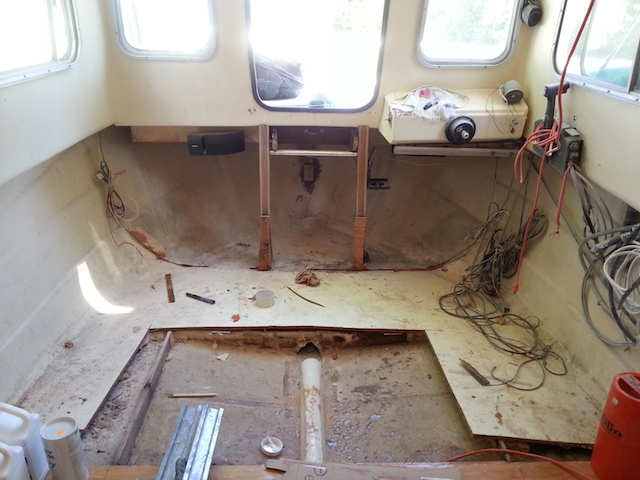
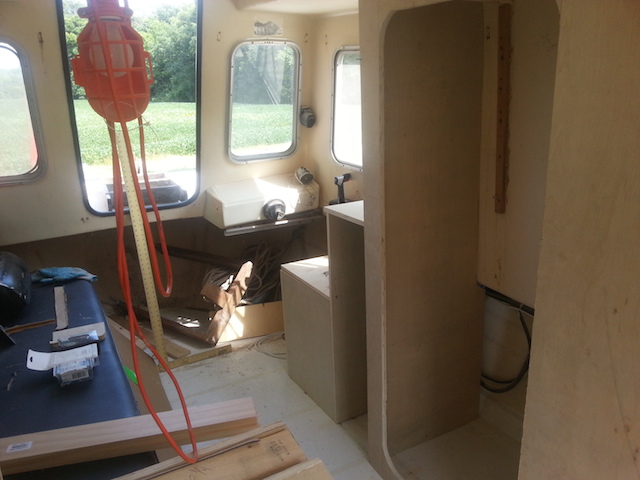
Forty year old boats are just that, 40 years old. And some changes were due inside. The snappy orange carpet from 1975 needed to be replaced so up it went. The floor seemed a little spongy so I decided to investigate that. The bathroom was the gas tank room (holding two gas tanks) and we wanted a bathroom inside again.
My wife and I wanted to do some internal changes so here we go.....
Too Cute – Third Time Around.
Below are some of the pictures as the adventure moved forward.
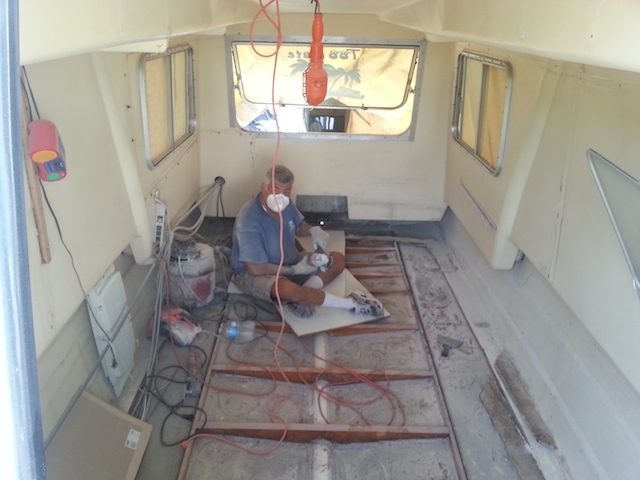
With ice still on Bluff Lake in Antioch, IL and no real boating in sight, I stated this adventure. Mind you I am an Electrical Engineer with excellent talents in that discipline but no real boating experience in doing a rebuild. Having built a few houses in the past, I know the drill... budget for X and have an open check book and be prepared to spend Y dollars. So, with that in mind here we go. You will note I am not putting the year on the date. This will not take a lifetime!!!
Here are two shots from the day before,
April 3rd

Got a little carried away on day one but at the end of the day.. It was clear that I was doing the right thing.
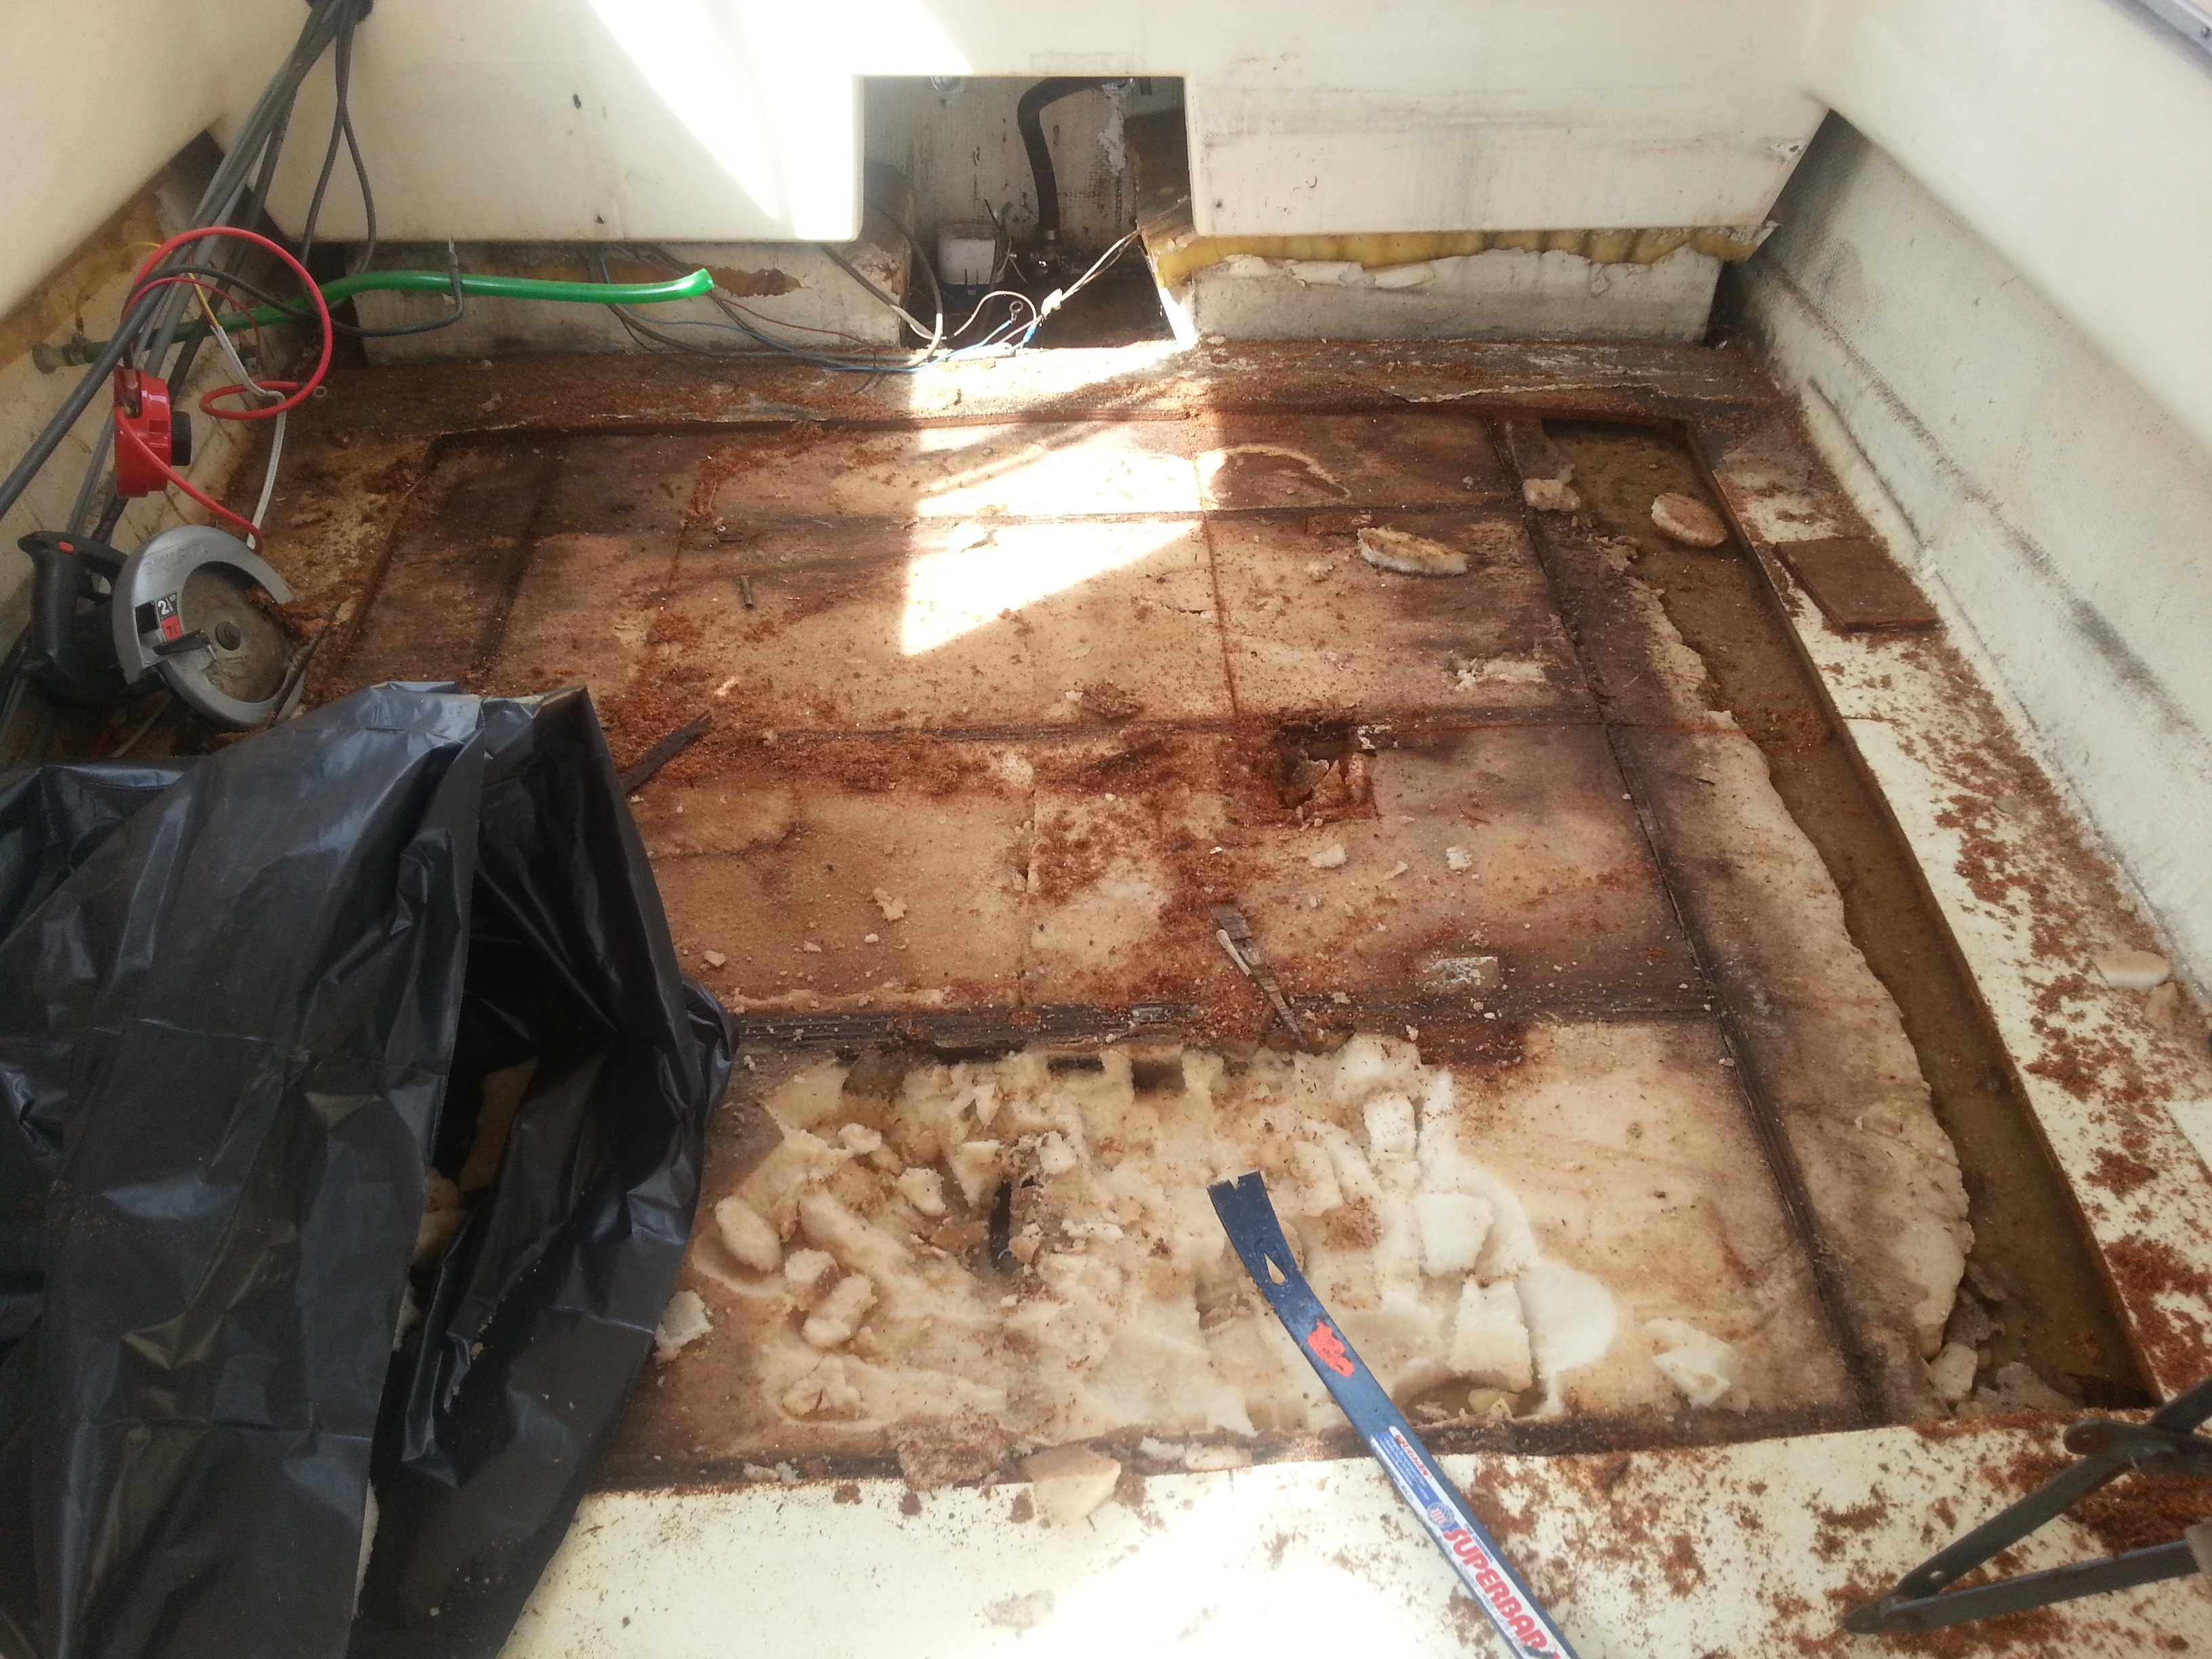

Day 2
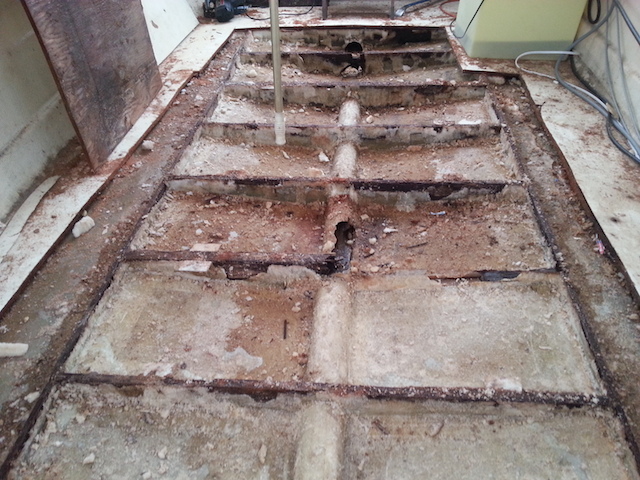
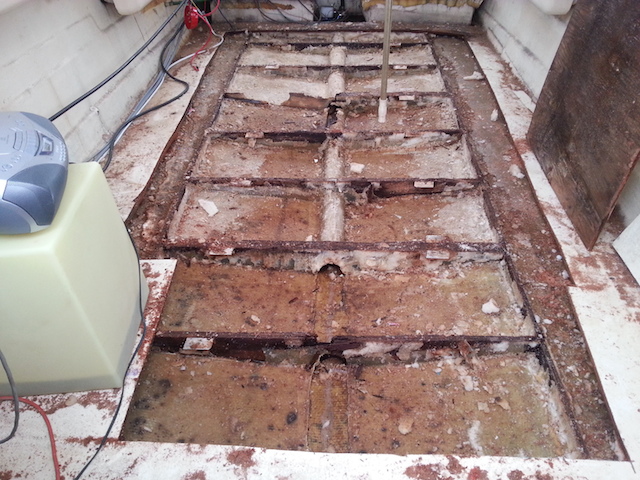
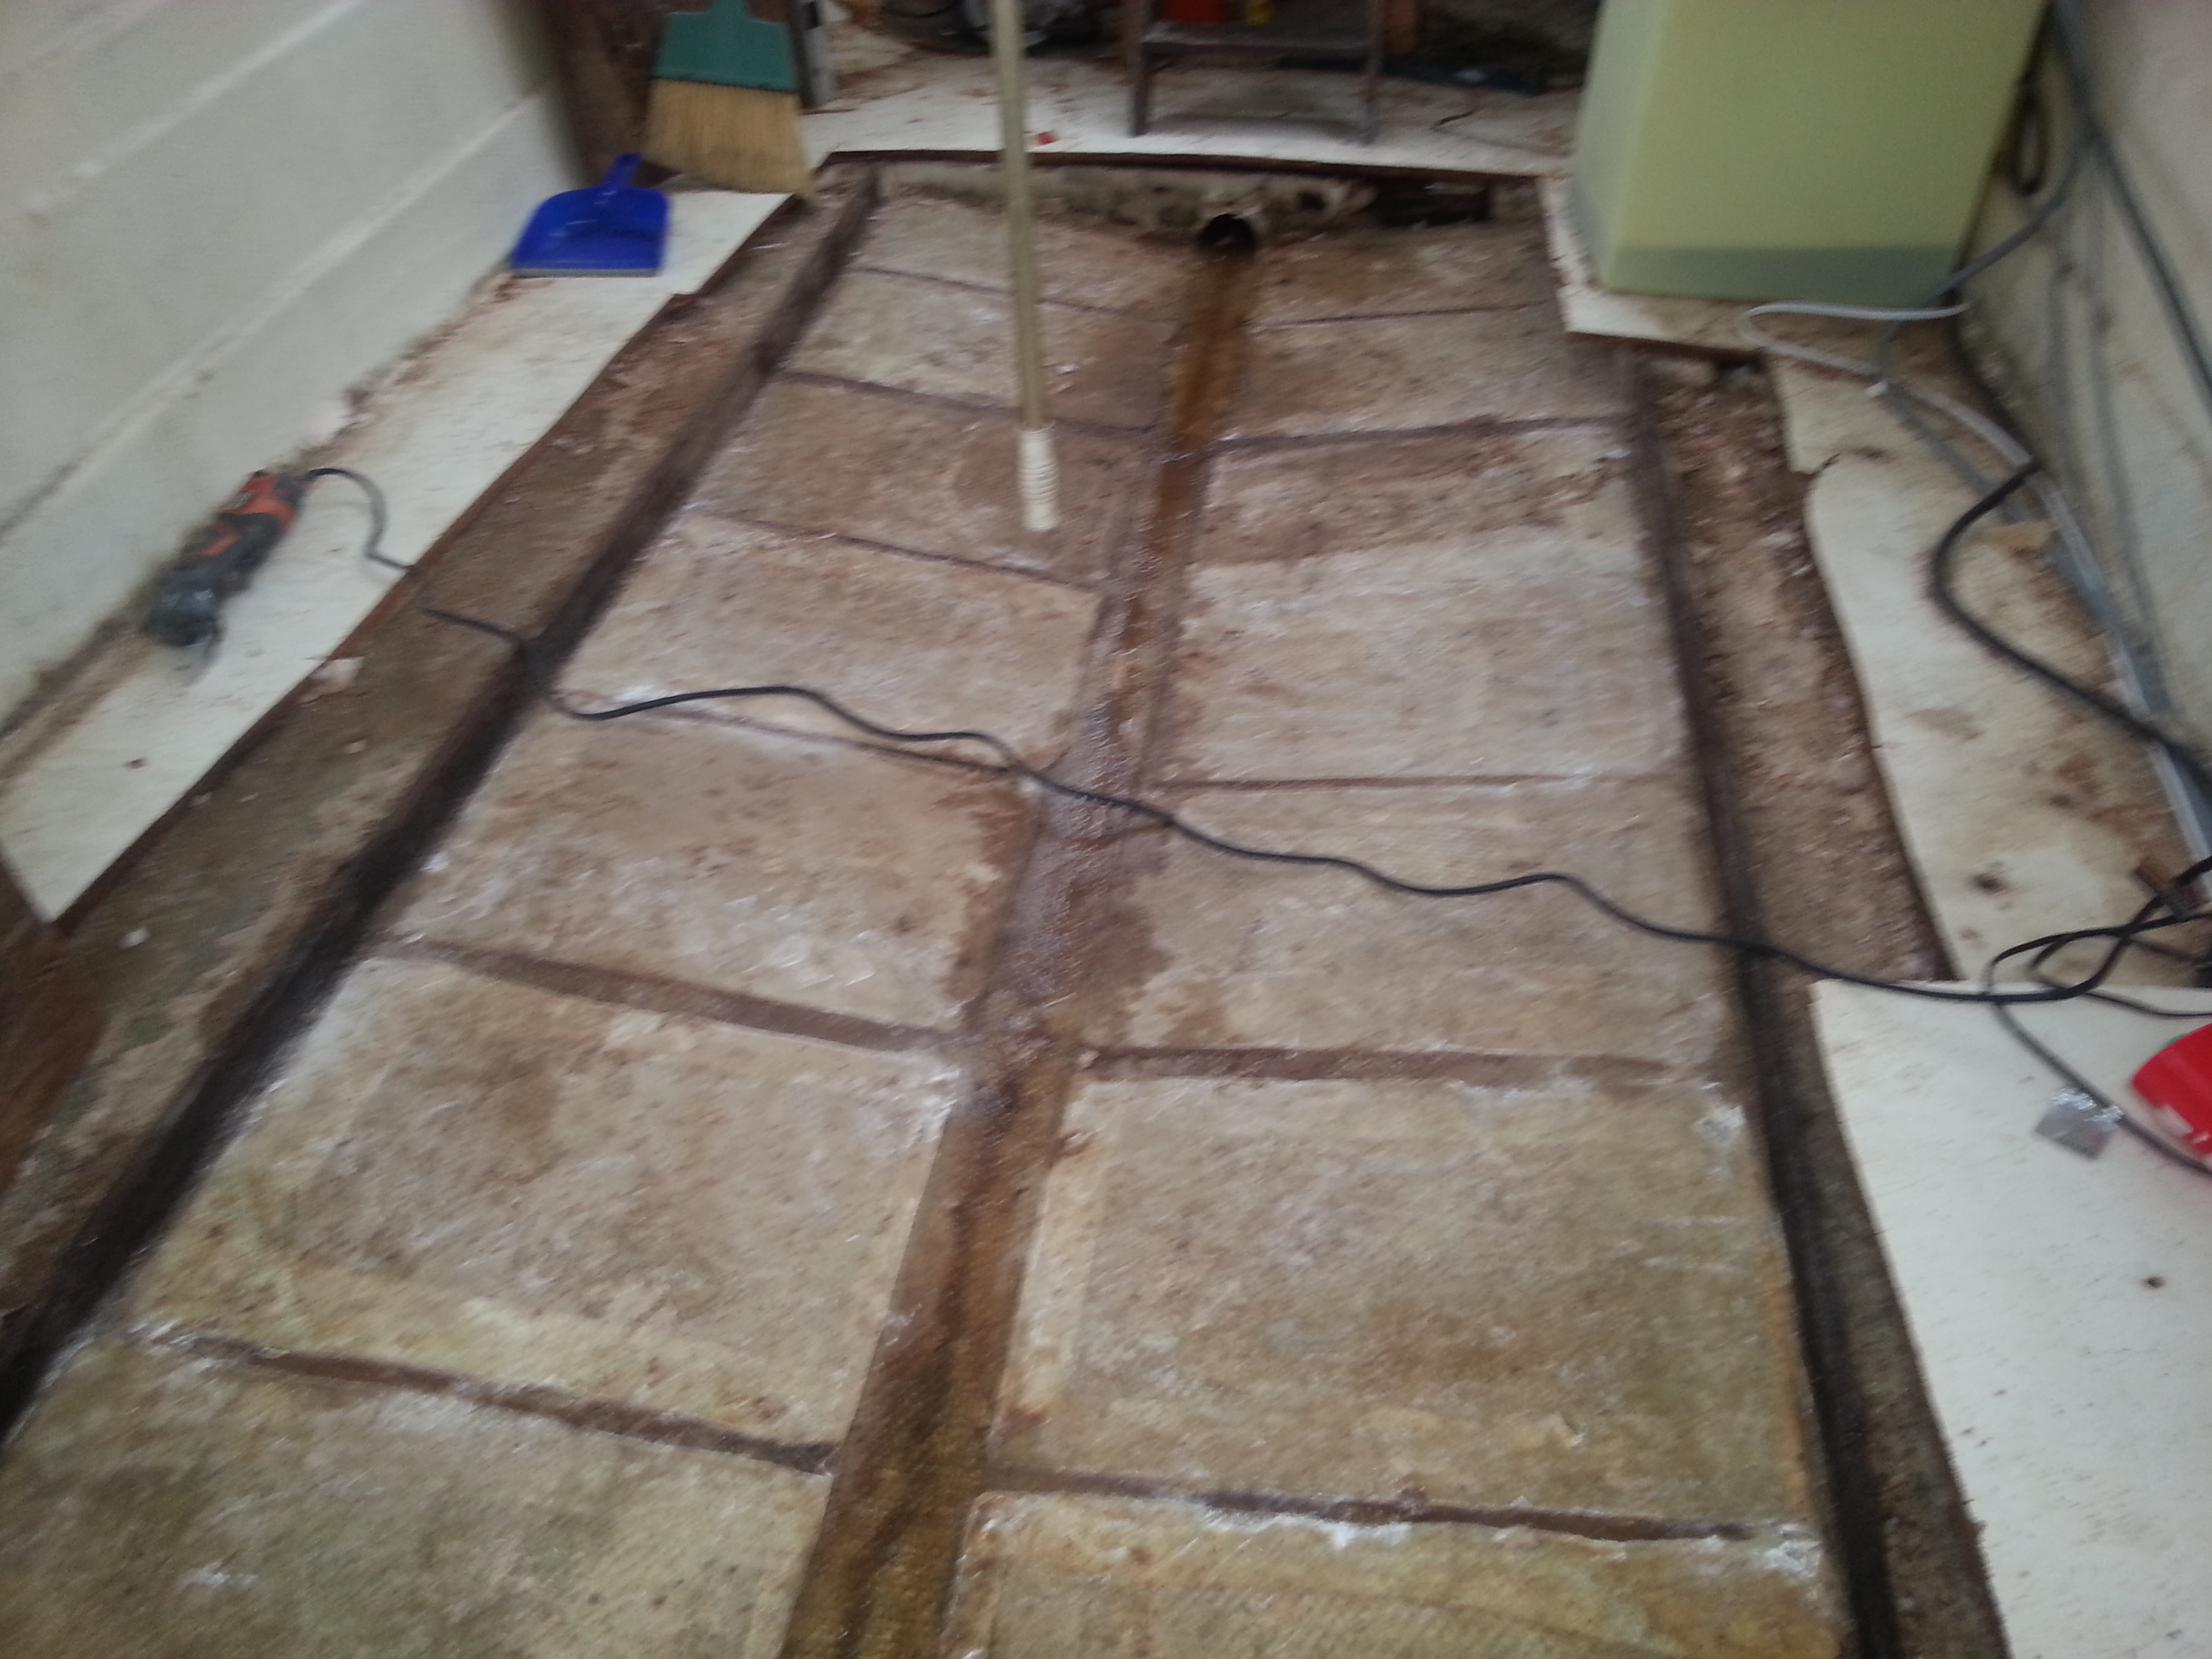
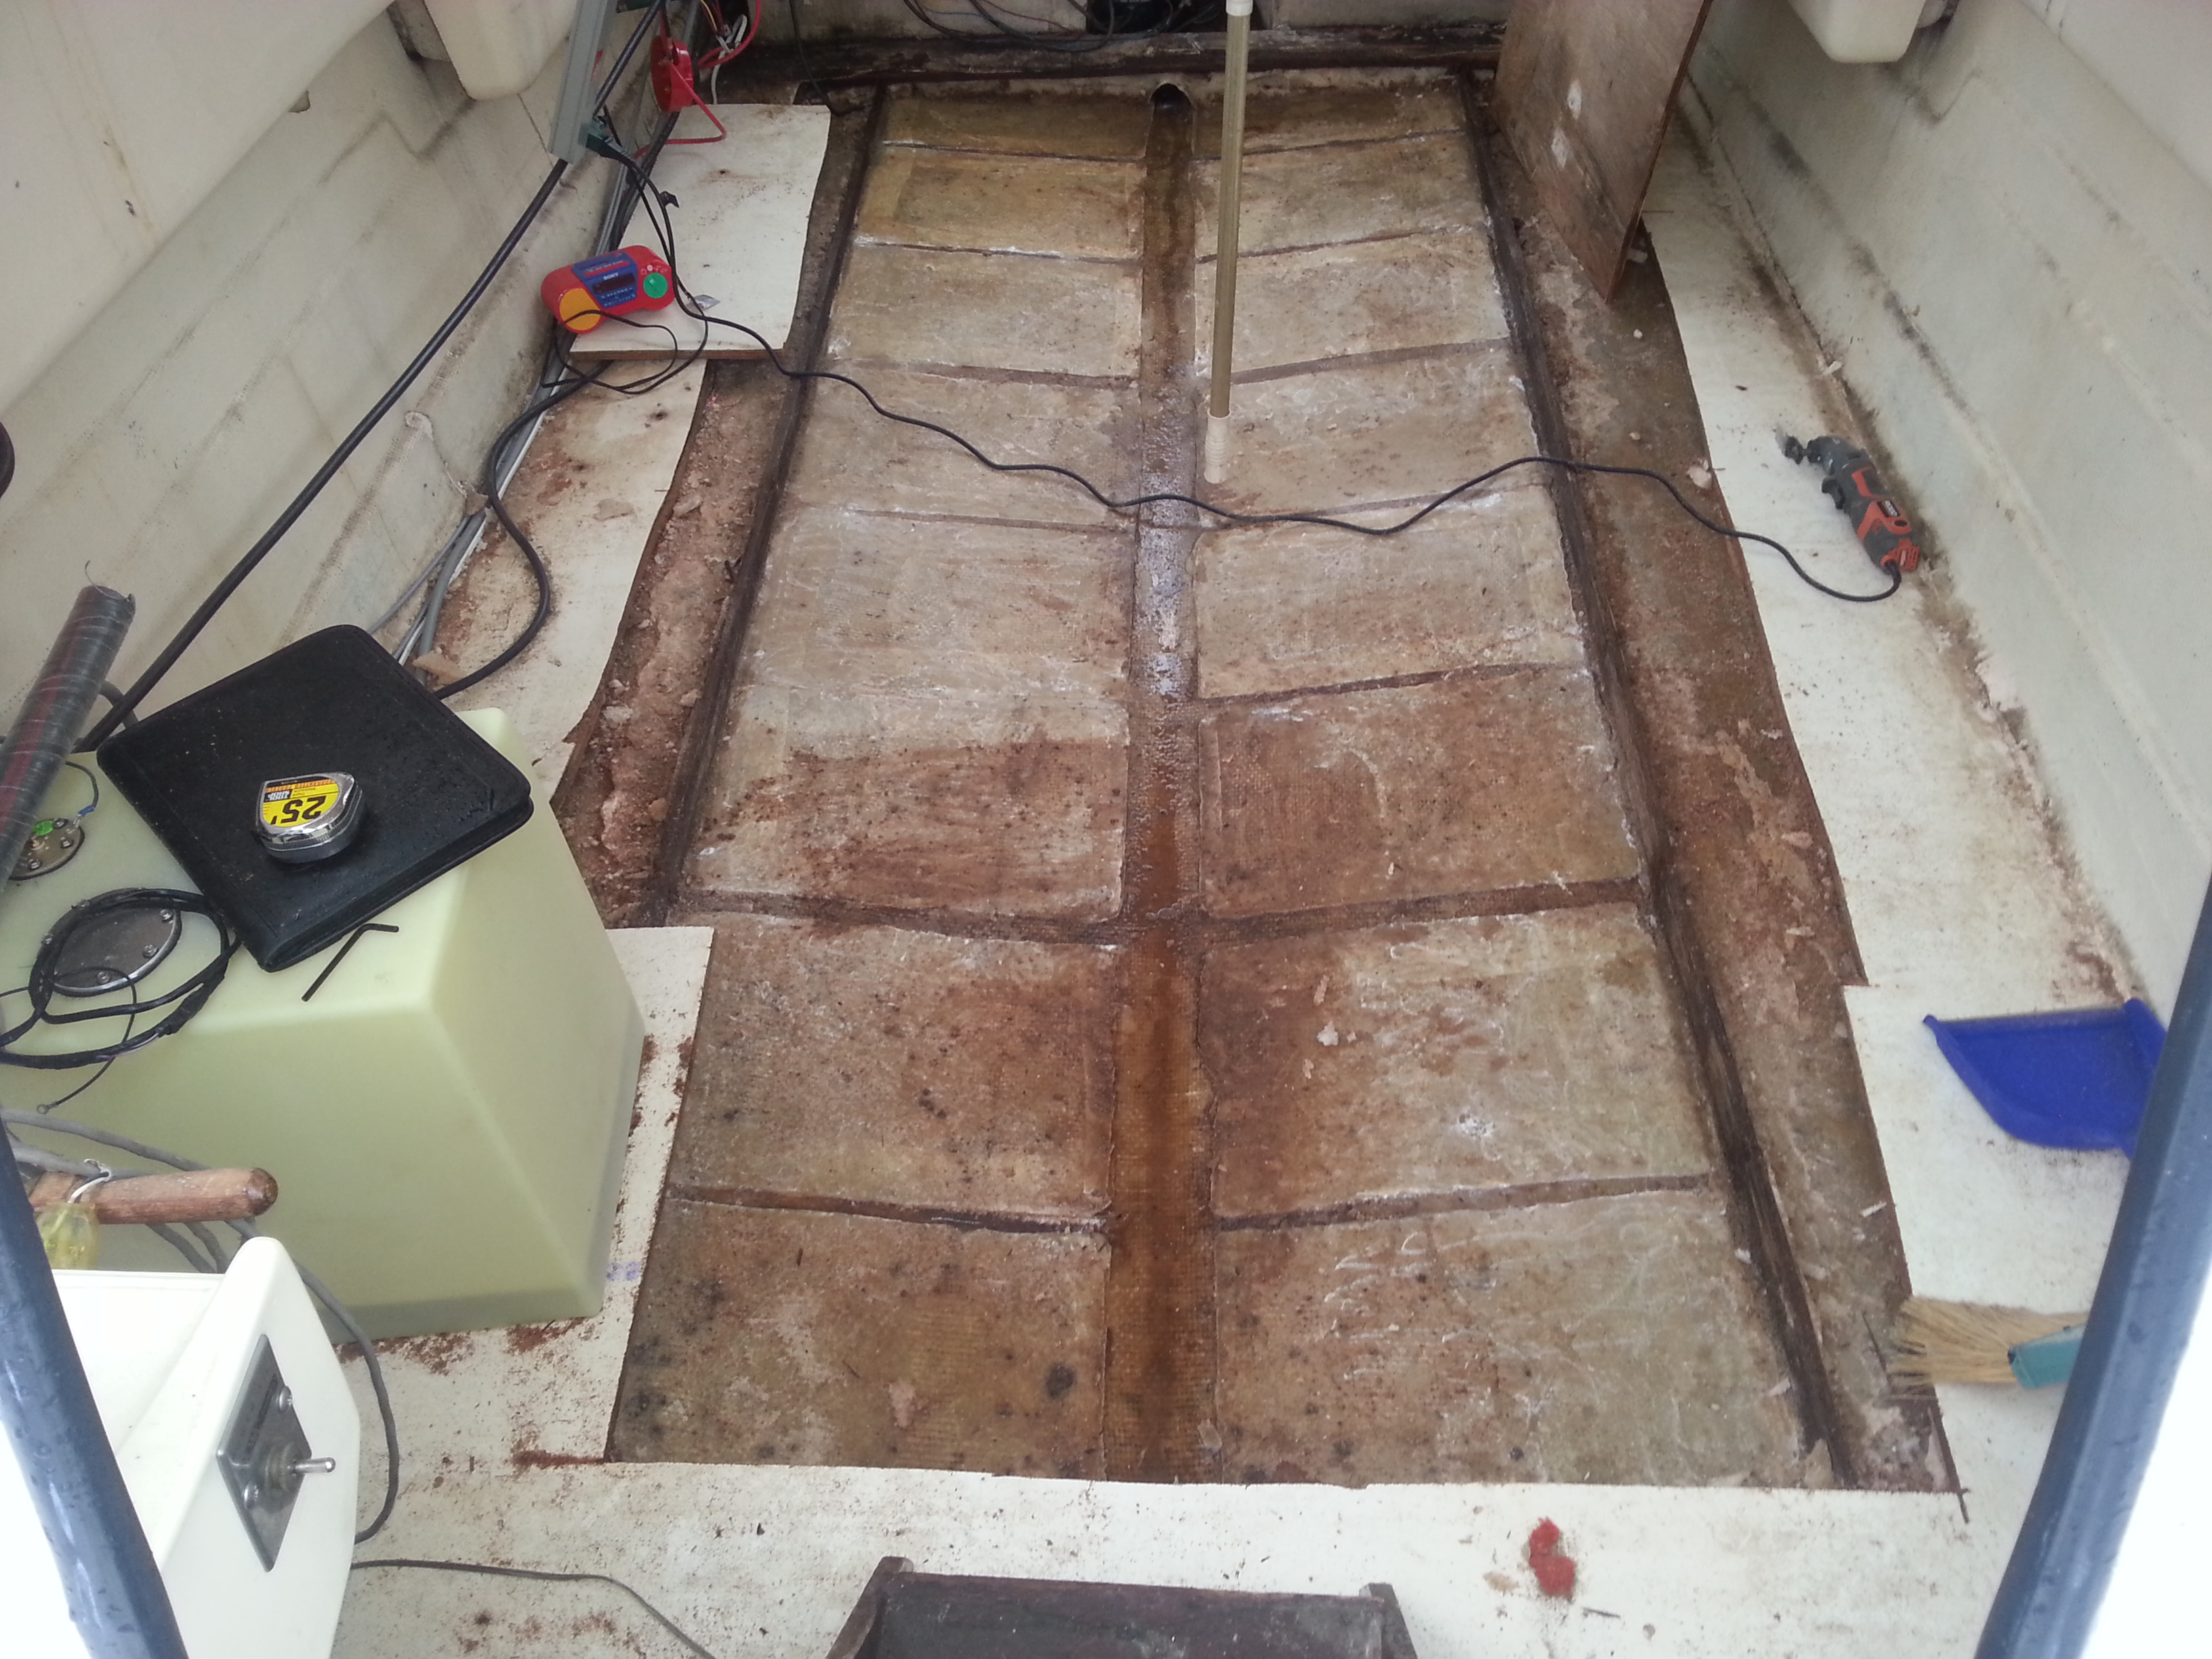
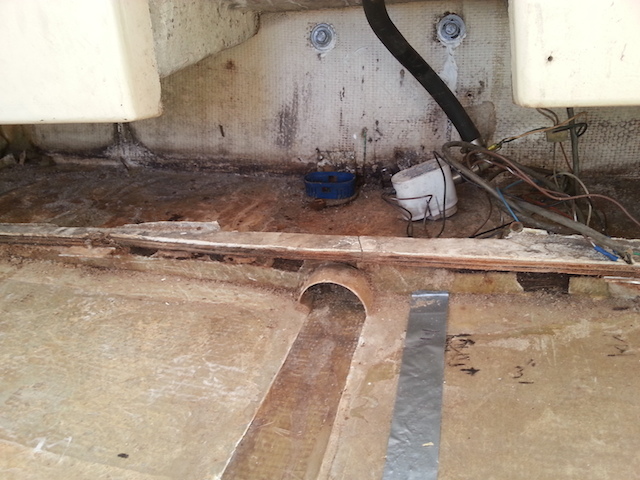
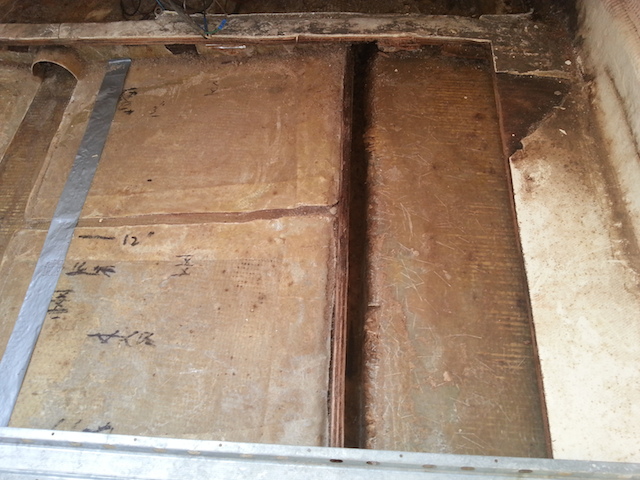
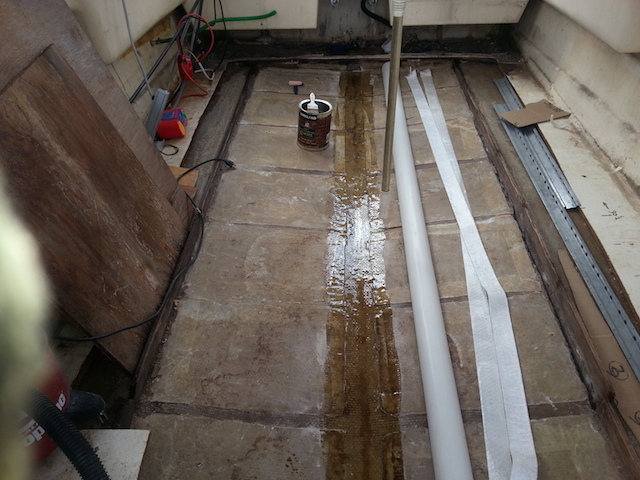
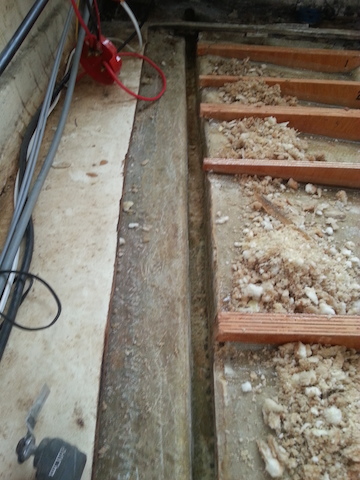
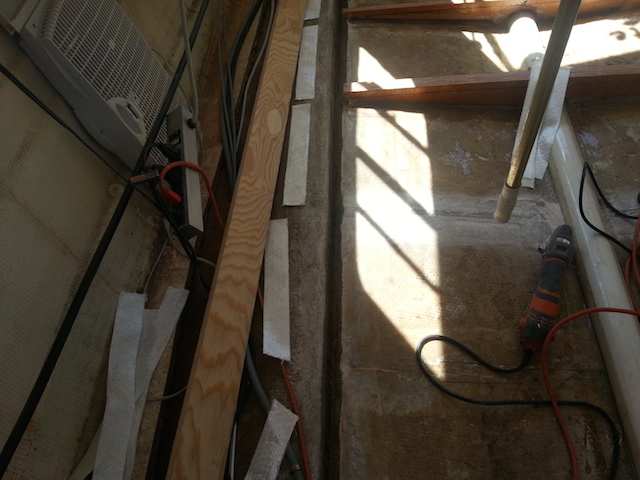
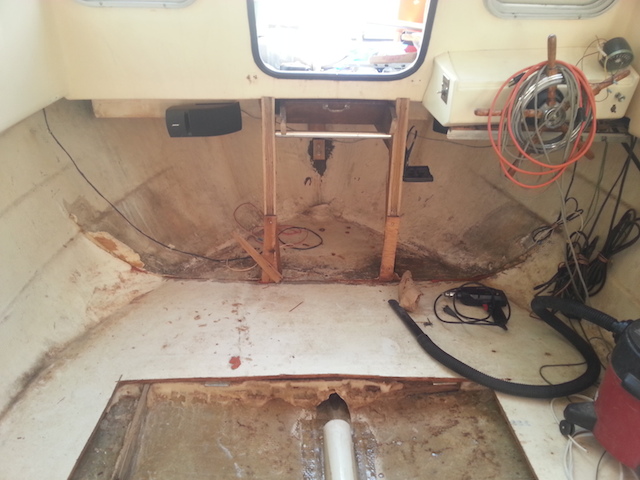
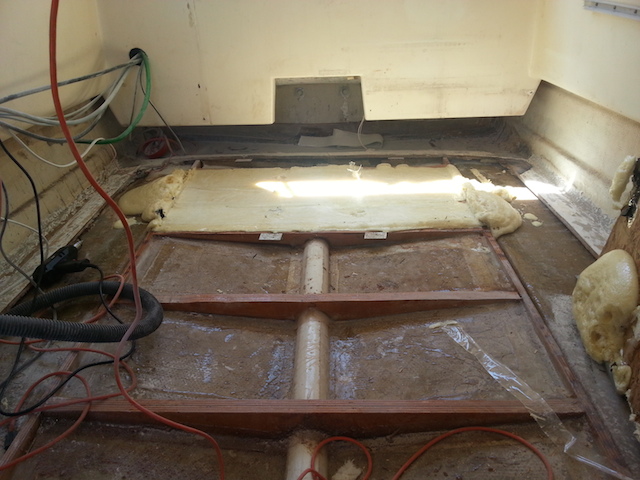
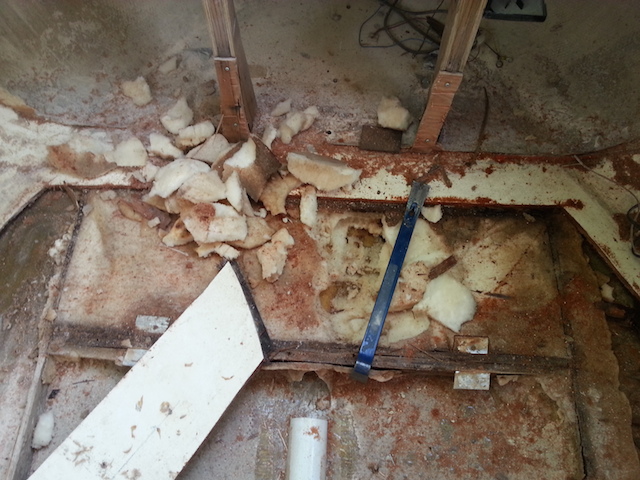
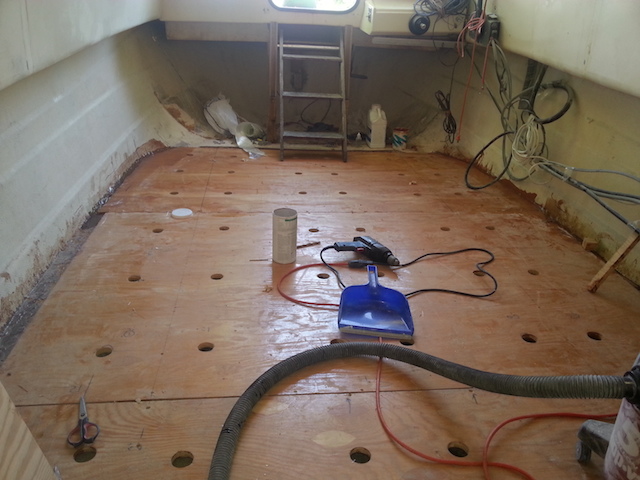
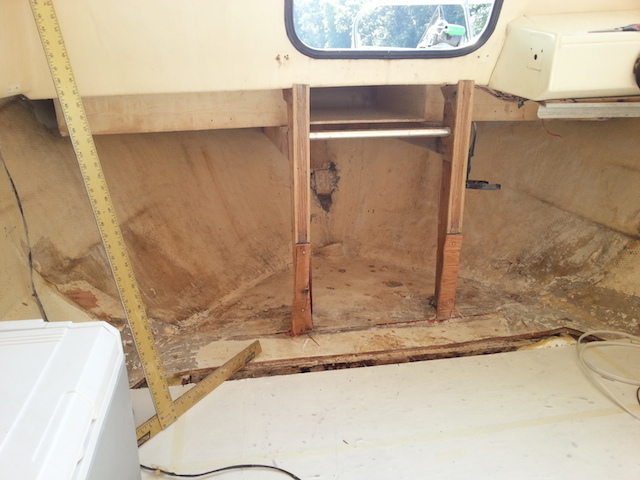
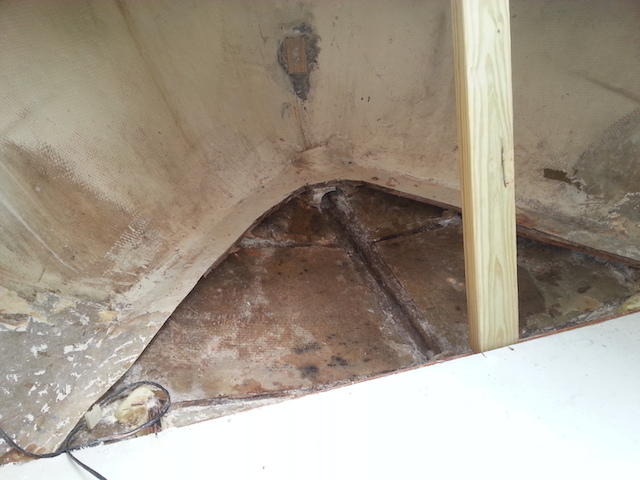
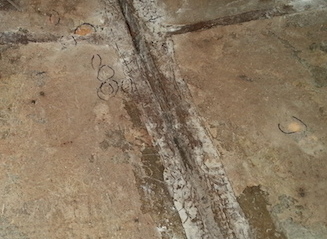
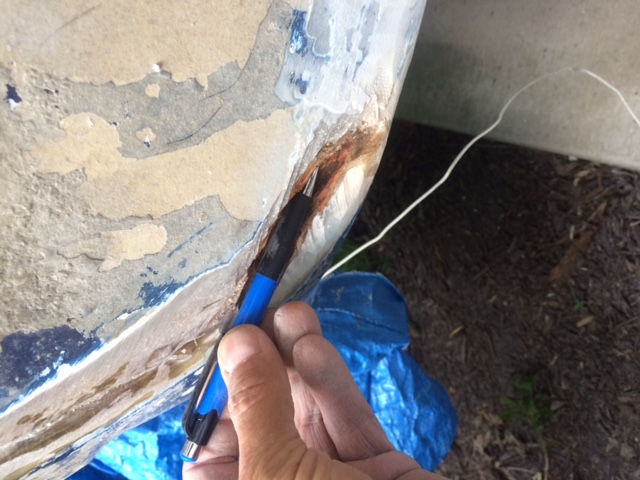
I pulled the floor as it was a little squishy. This kind of explains the tilt the boat has towards the stern. In between the stringers (that are rotted) there was about 800 lbs of wet foam. It was the consistency of slush I would call it. The day went well but I just got tired. Thankfully Brandon came home to help me get the bed out of Too Cute. Exhausted, two Advils and a hot bath are in order for today.. Oh, that is water sitting in the hull! You can easily see where the drain tube “blew out” and started the leak into the waffles. That was one of two original problems.
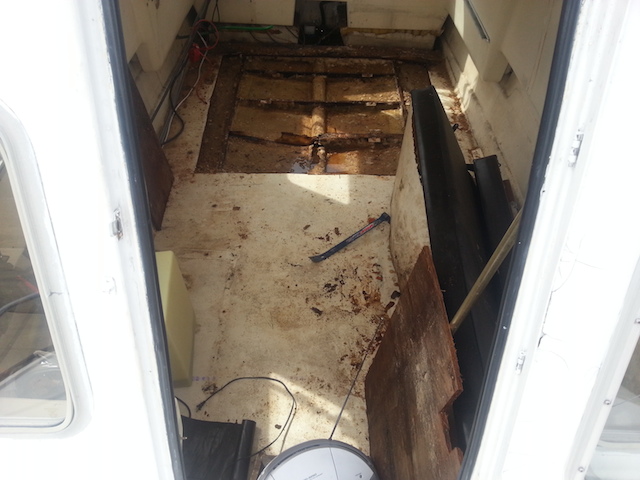
So after a few Advils went back at it for another bout with Too Cute.
Here is the result. END – day two.
Day 3
After a somewhat good day at work and realizing I am the boat rebuilder.. back at it till it got dark. I am now becoming one with Too Cute...
Day 4
After a good day at work a few more hours..
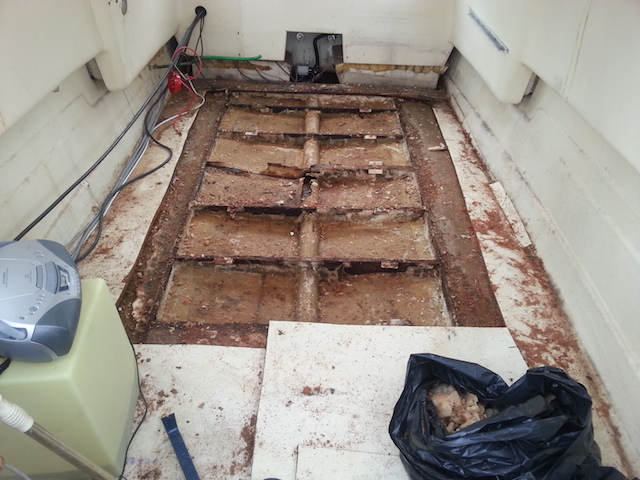
Days 5 &6
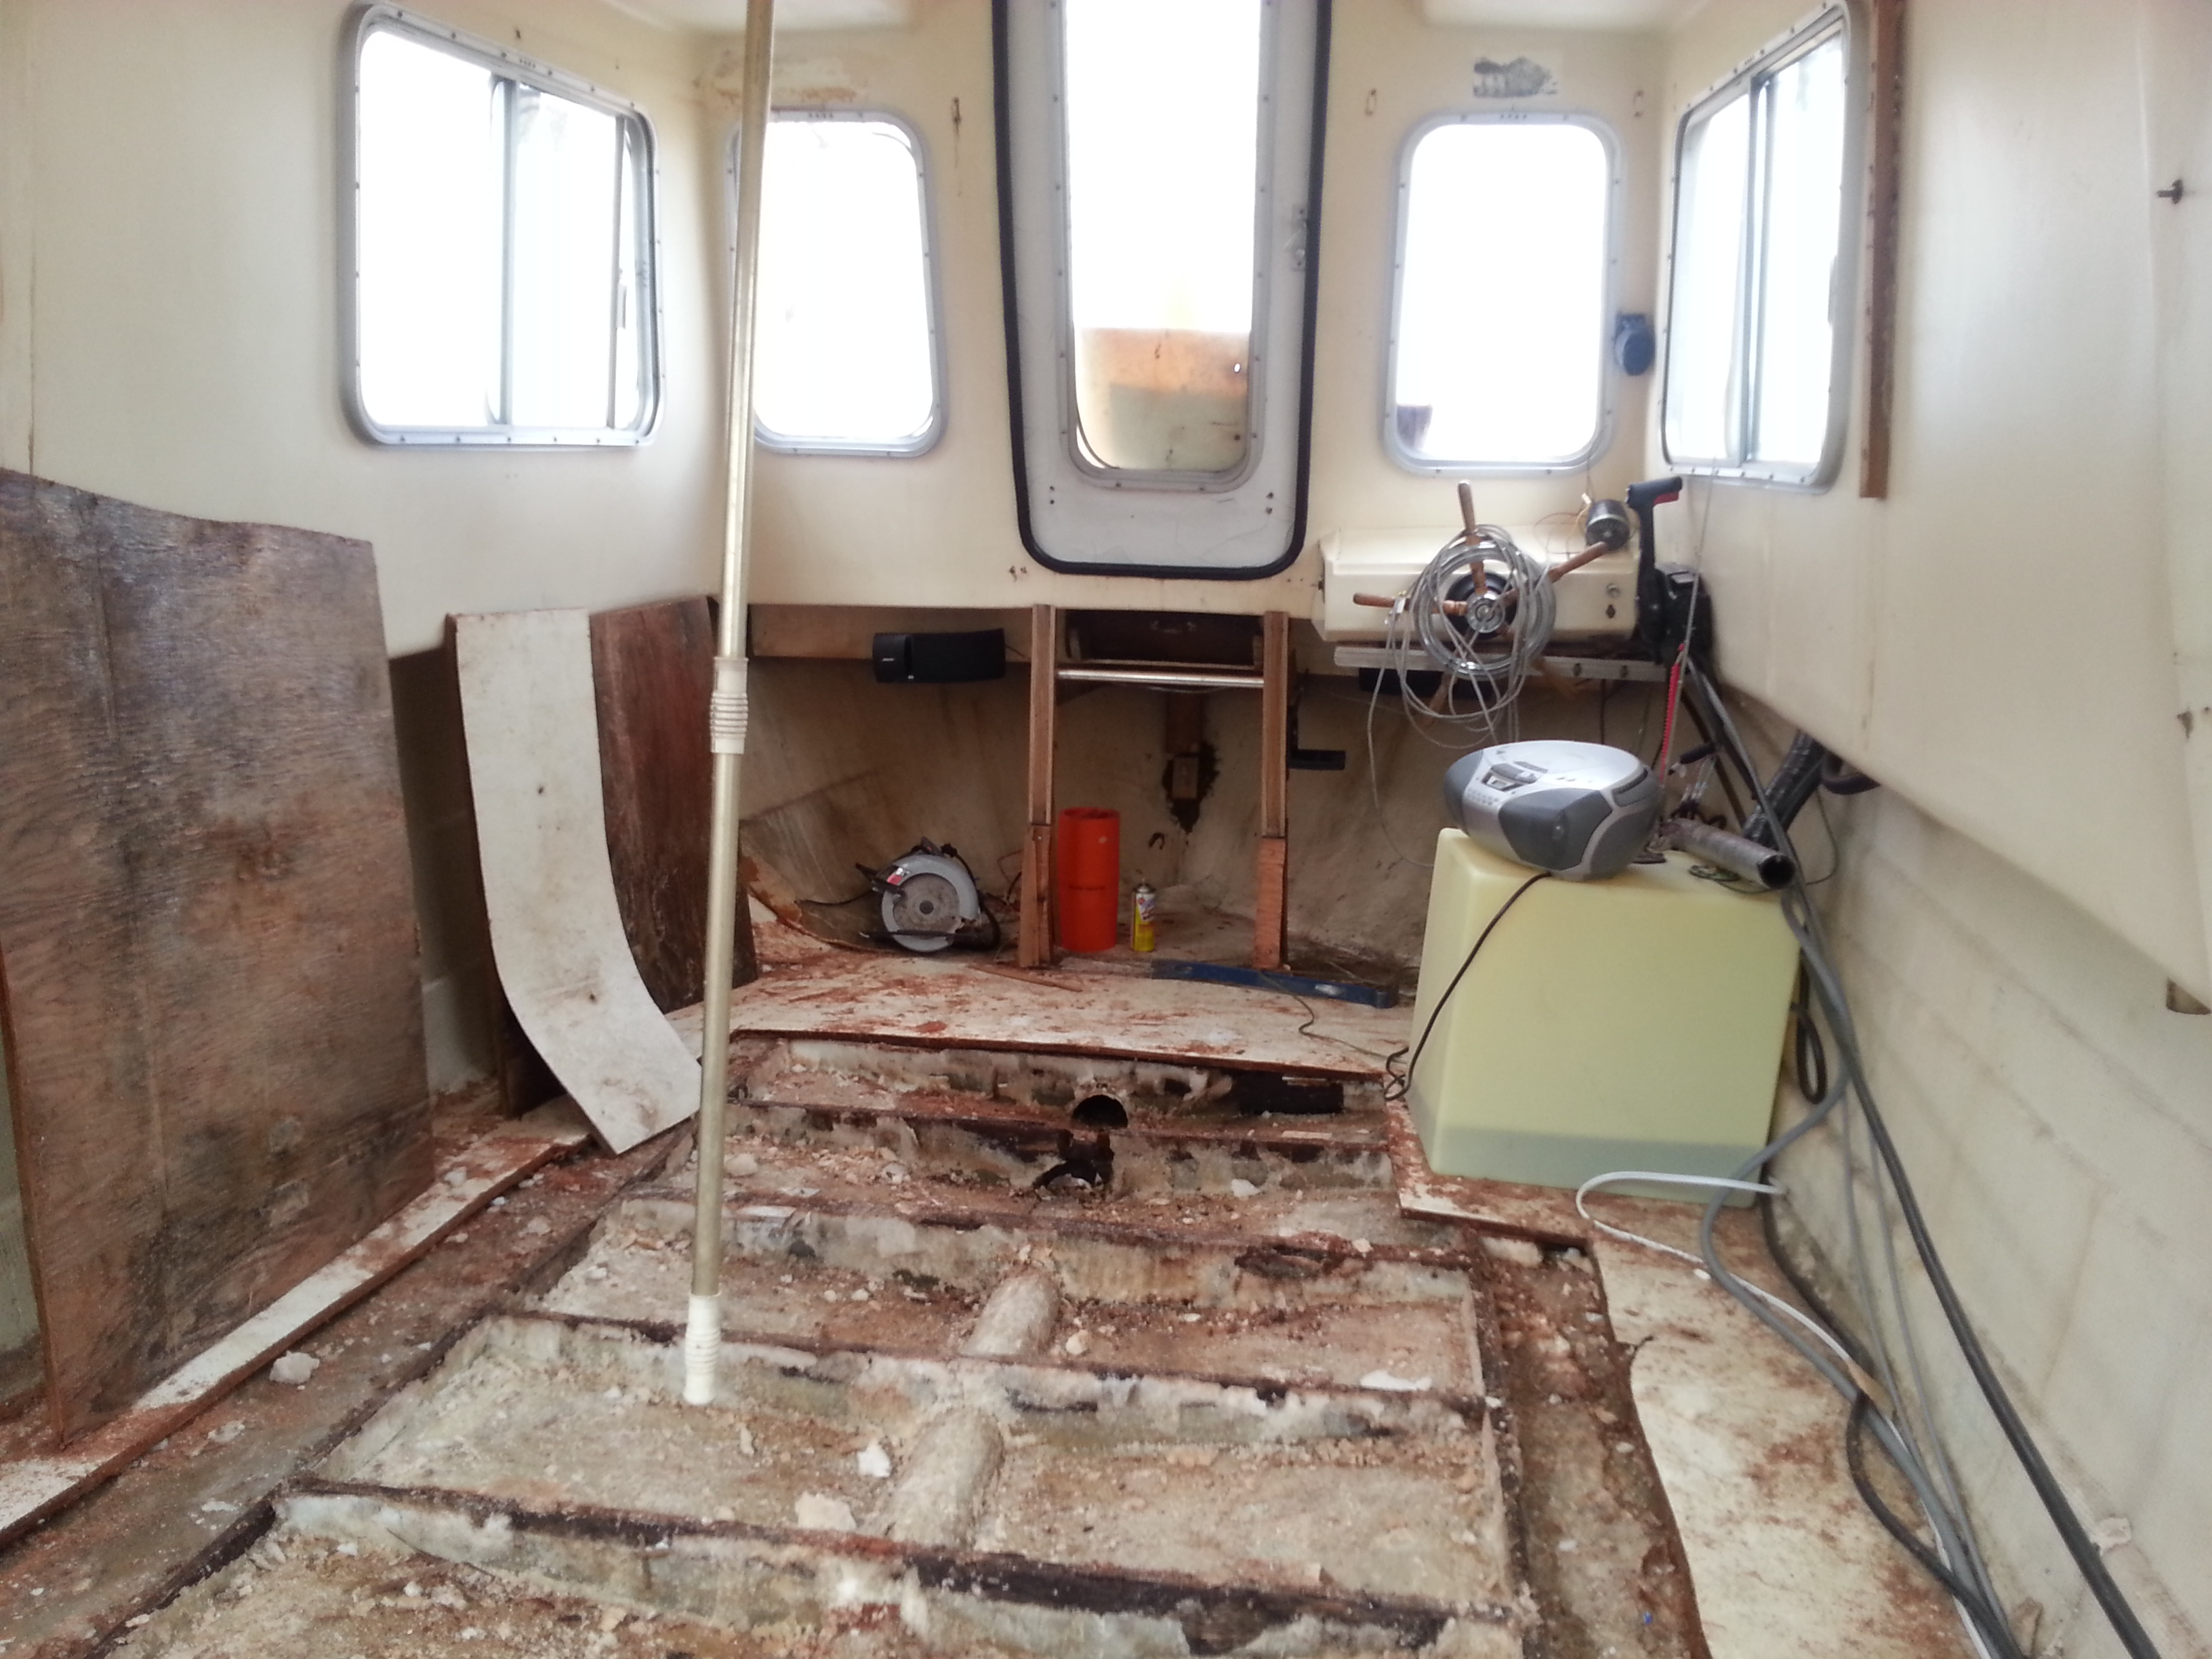
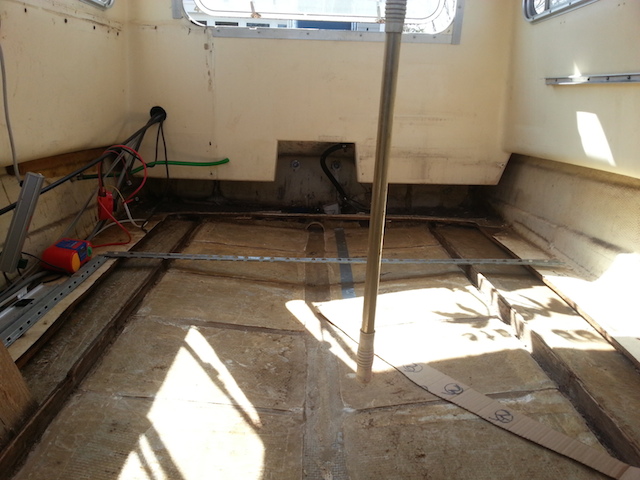
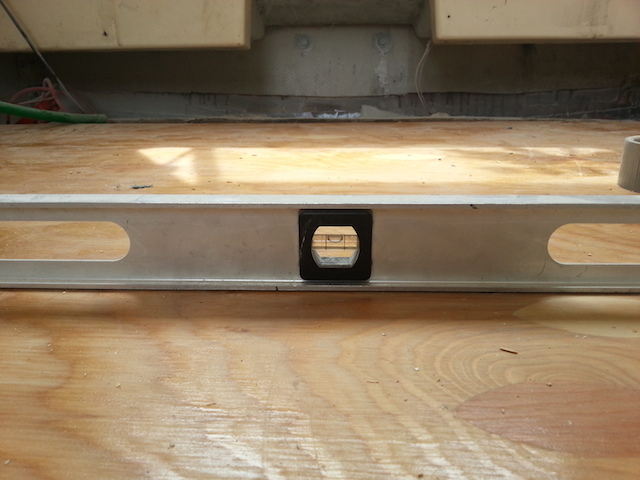
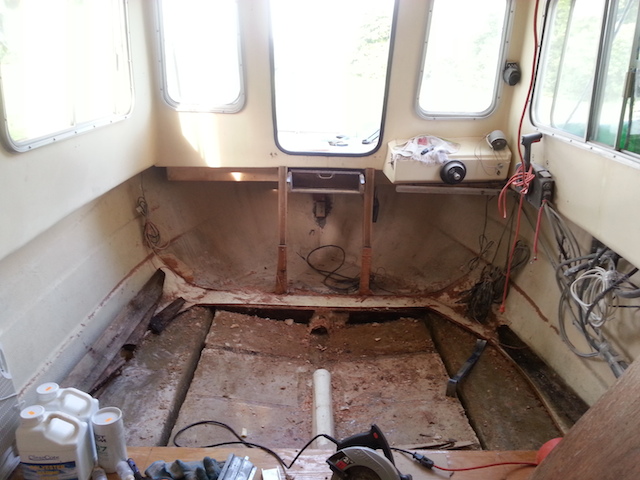
Yesterday we had ice pellets outside, so time was limited inside Too Cute, but some more work with a new tool (Black & Decker Oscillating Multi-Tool) and some of the stringers were pulled out. Measure, Measure, Measure.... that was the operative word for the day! Sunday, it rained and was foggy so I leveled Too Cute so I could cut some of the stringers that I feel were support for the sides. After leveling the original floor, I supported the outside of the boat so I could continue the process. At the end of two days, I got about 90% of the stringers out and about 90% of the floor scrapped. There is water is coming from the bow, an area yet to be scraped... At this point in time, I am realizing the entire floor is going to be NEW!
Day 7
Been away for a few days in Tampa for the Jimmy Buffett concert but back at it again. Digging and scraping, scraping and digging, the hull is starting to resemble what it should be looking like – just glass. I have found out the stringers are not one piece! They are assembled with one 8' and one 4' for the 12' length - this will make my stringer work easier. I decided to change the position of the transom stringers so they fall directly under the seats (doubling them up as well) to make it more stable. This also places them at about 12” on centers, rather then the 14” on centers as they were originally done.
With all the research I have done... I am taking a unique approach on the short stringers... I am going to glass them (they are about 46-1/2”) starting from the stern and continuing towards the bow and stopping at the length of the 8' making them level with the rotted stringers.... then remove the rotted 8' stringers and glass them in. This seems logical for me (remember... I am learning this as I go along with all the research from the good folks at iboats.com)..
Next week for the grind and start of the stringers, grinding the hull and glassing them in – wish me luck. It has been years since I glassed my 72 Corvette.
Day 8
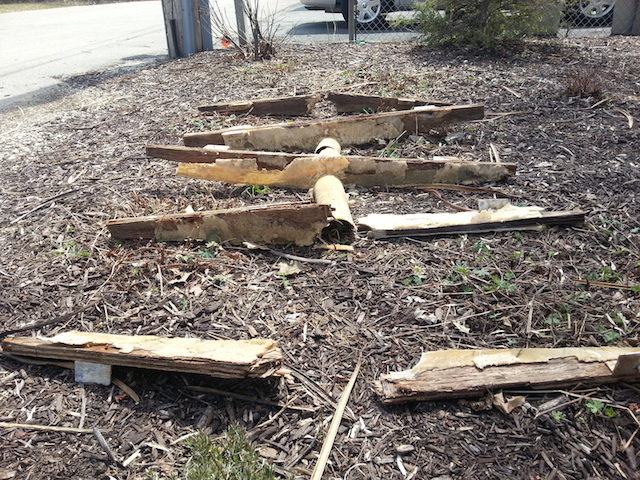
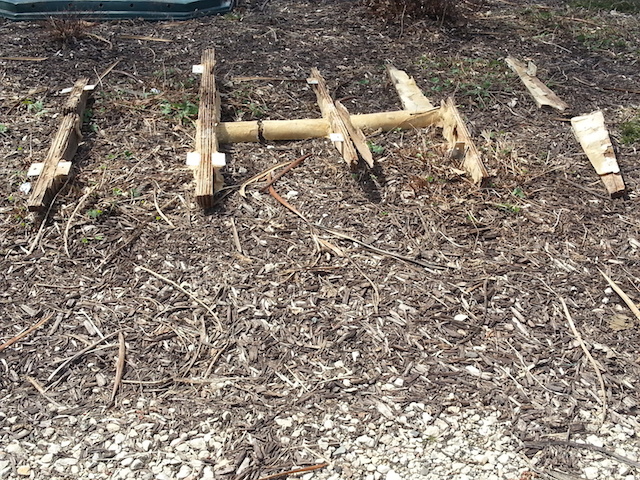
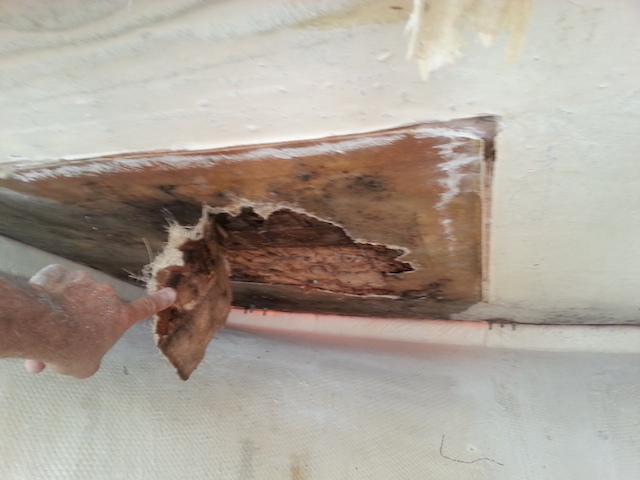
Apparently you need 60 degrees and above to glass in the fiberglass, not sure why that has not changed in the past 30 years since I worked on my 72 Vette but apparently, you need to be at that for the hull, etc for maximum strength when applying so in the meantime.. I am gathering up supplies for the next stage, the glassing in of the transoms. Parallel to that, I am getting the new drain pipe materials. And... waiting... Here are some of the transom's I removed from the hull.
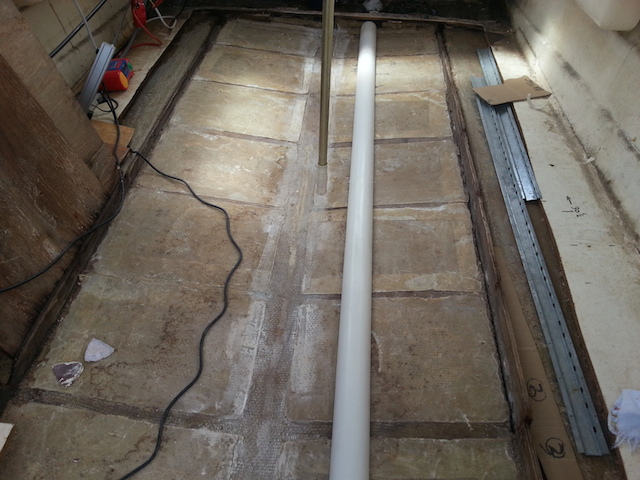
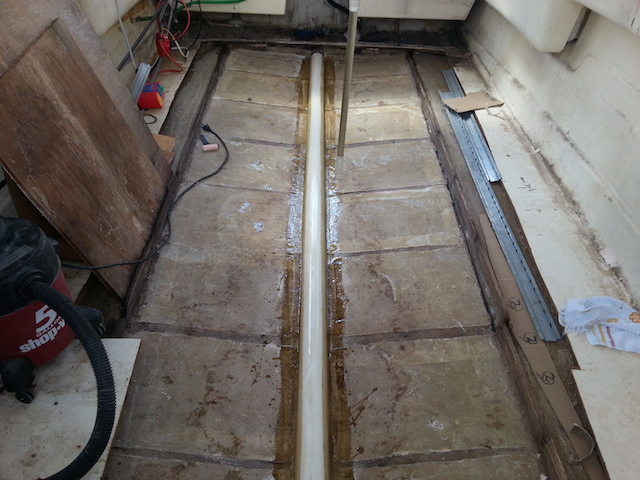
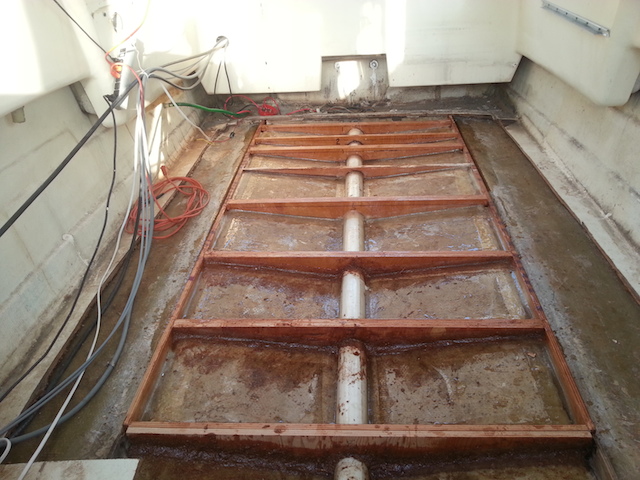
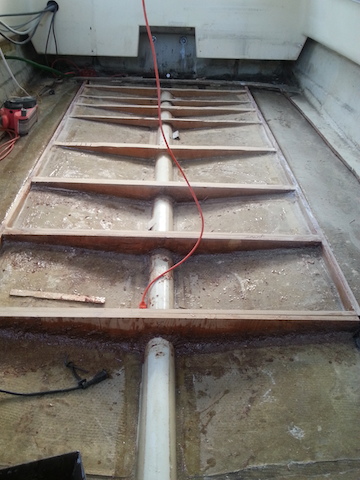
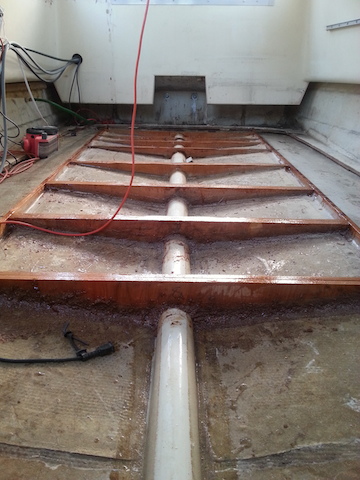
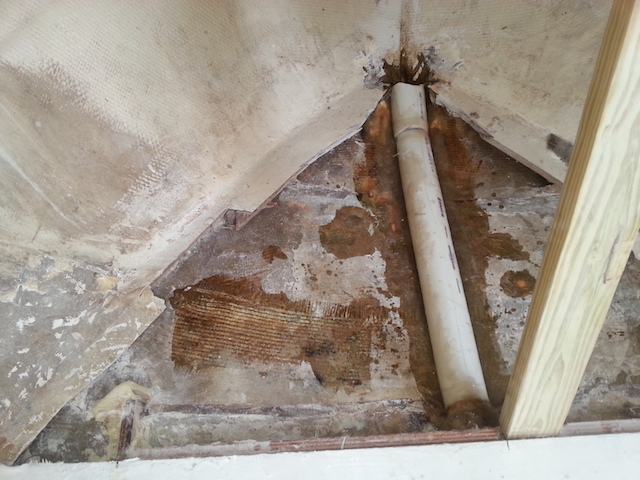
With a brisk 42 degrees outside, we are off to a great start. Final sand of the center where the drain tube covers, new 4” Schedule 40 PVC and some 1708 along the entire drain tube. The purpose of the tube is to allow water to go from the front of the boat to the back. The “waffles” as I will call them.. the area between the stringers and the transoms..... about 20”x15” each are filled later with floatation foam – each stands on it's own. No water is allowed into it if done right. The floatation foam also adds to the stability of your floor so don't forget it! Oh, yes... it will allow the boat to float as the original intention but.. YES, it does strengthen the floor so it should be just like a house floor when you are done. Stringers are gluing – all are double 3/4” Marine plywood. The “gap” between the transom's and the hull are filled with PB, a mixture of fiberglass “filler” and resin (with hardner of course) then once “glued” you use 2” and then 4” glass to make it solid. You will find your hull kind of flimsey before the transoms are completed.
I decided to glass the center again to allow water to easily go back to the stern. Waiting a few days till I will go back in to make sure that all the resin/hardner has done it's job.
Day 9
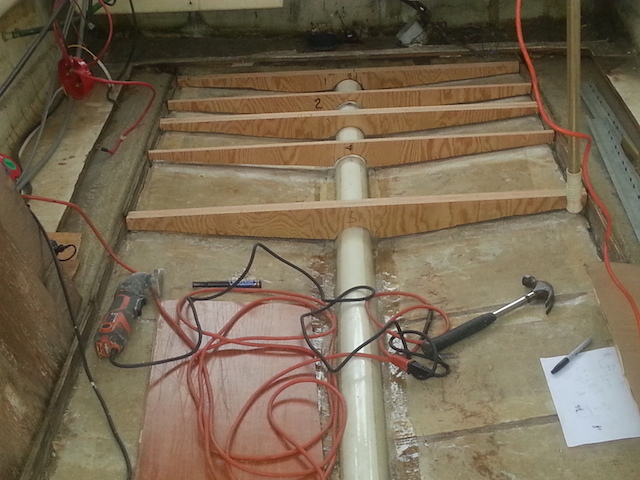
Started the transoms, getting the feel of this. You will notice an odd spacing of transoms on the floor. I decided to space the floor so I have support under the seats and other high weight areas to better handle the loading. Most of the floor follows the 14” spacing that it originally had. In case you are wondering... The new transoms are tabbed in exactly level to the two rotted stringers. Once they are in place and glassed in, the old stringers will be removed and new ones placed in exactly the same place. So far.. everything is perfectly level. Marine grade plywood is used throughout and before placed in the boat, after they are cut to the exact size, resin is applied to all surfaces! Resin to initially tab them in, PB under the transoms using freezer bags to apply. Too Cute will be back in the water with a great floor!
Day 10
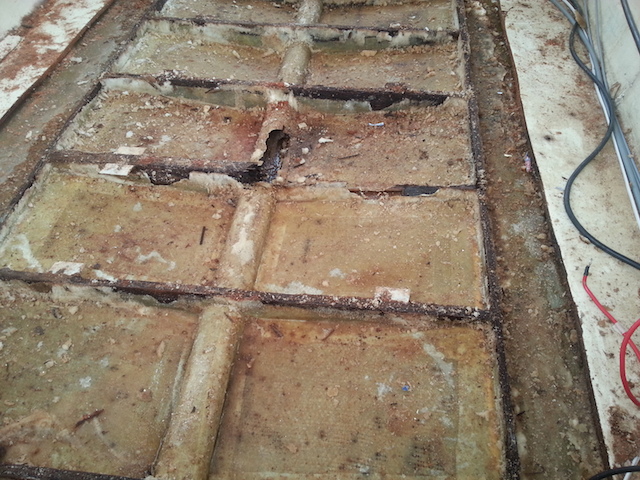
Dig, Dig, Dig... still some of that slush in the sides, got to get it all out. Good thing there is “nothing” left after this “dig..
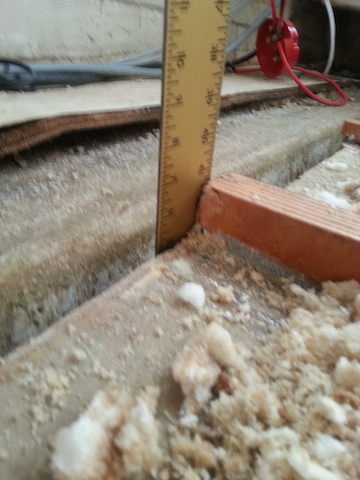
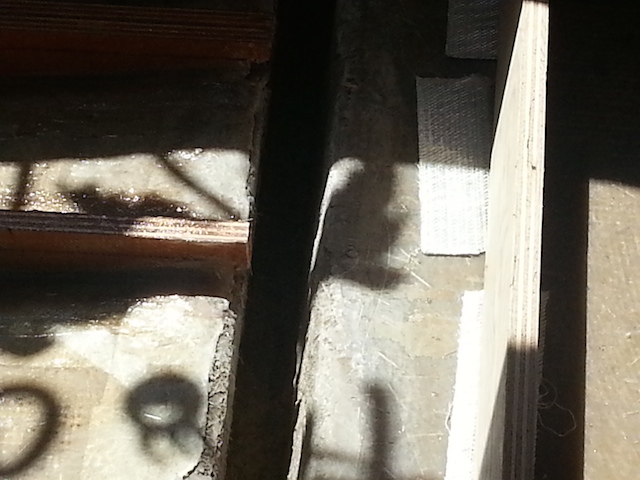
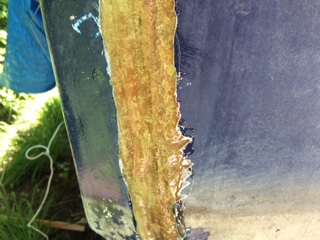
I am seeing the end at least on starboard side.. A little hard to see but the slot is 5” deep!
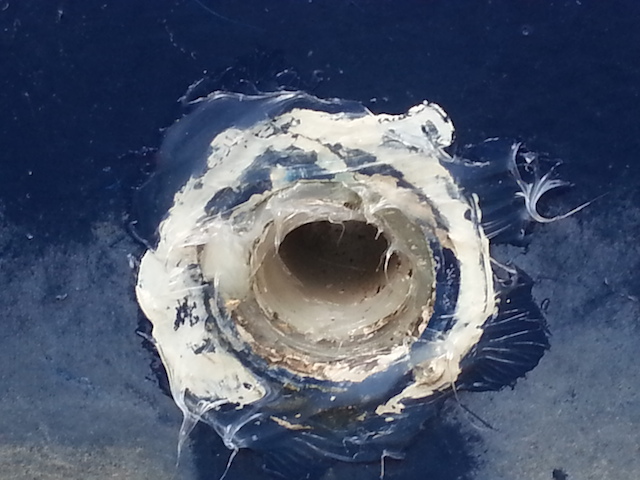
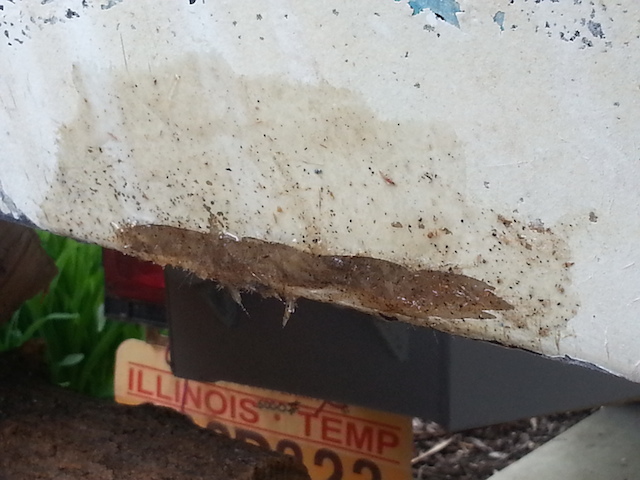
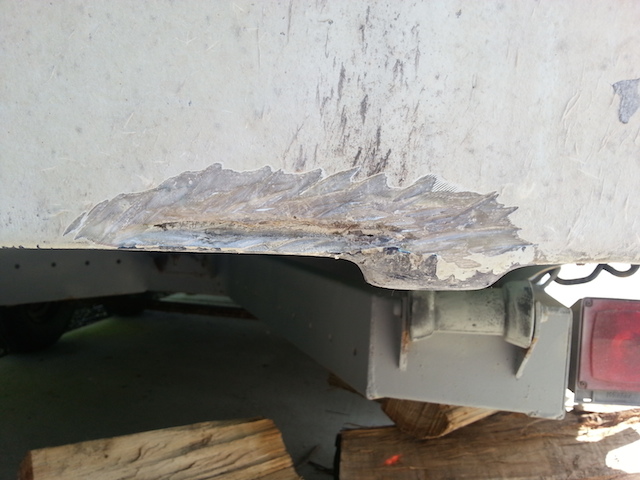
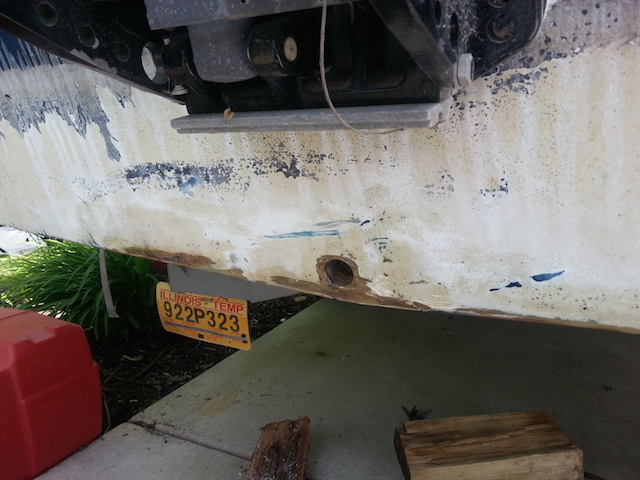
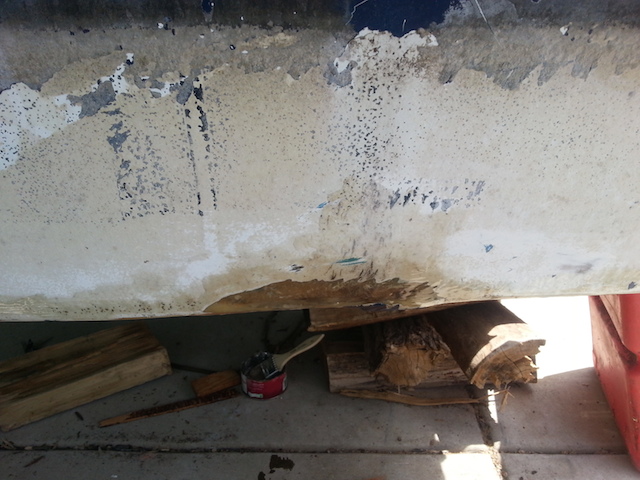
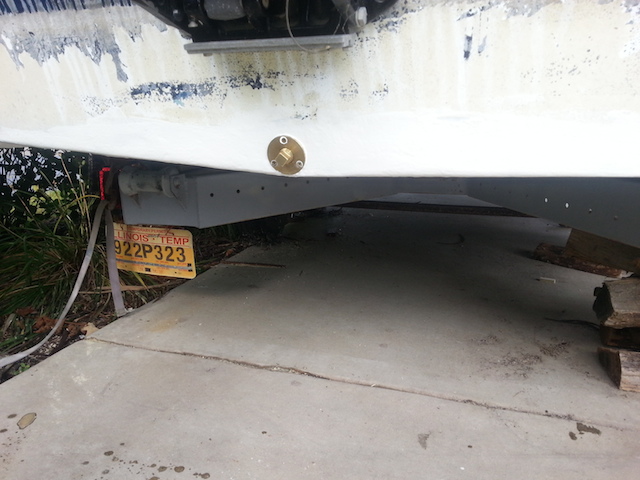
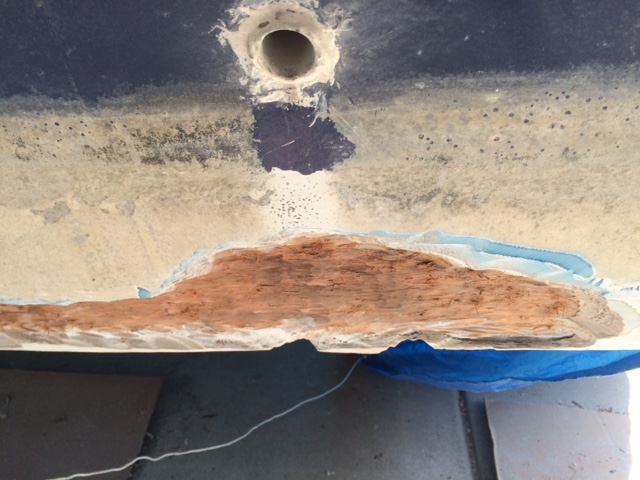
Did some more digging after the above pictures but in all honesty the left side looks just like the right side. I kept trying to figure out where the water is coming in from, and then it hit me... Spending all the time in the hull, looking at the transom that was replaced 4 or so years ago... I finally figured it out... From the amount of water coming in you would think it had a hole in the boat. Well.. here you have it.. The water puddled after a rain in the splash wells - (probably 2 gallons on each side..) then it was supposed to go back to the water but... with the drain feed-through cracked on both sides, most (all) the water slowly seeped back into the back of the boat. Caulk for now to work on the boat, I will replace them with brass so they do not crack again... Problem solved!

Day 12
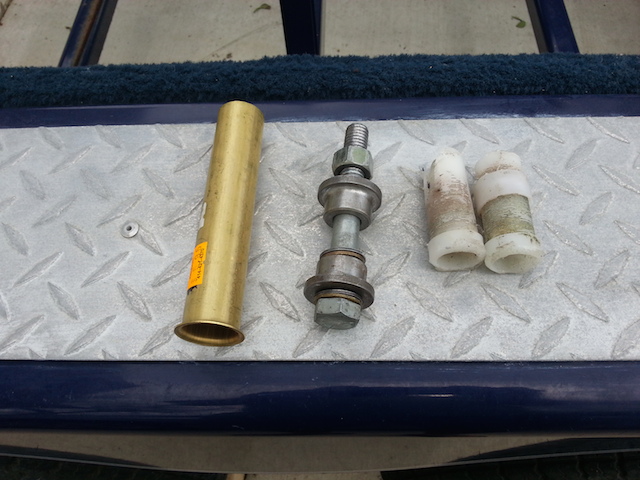
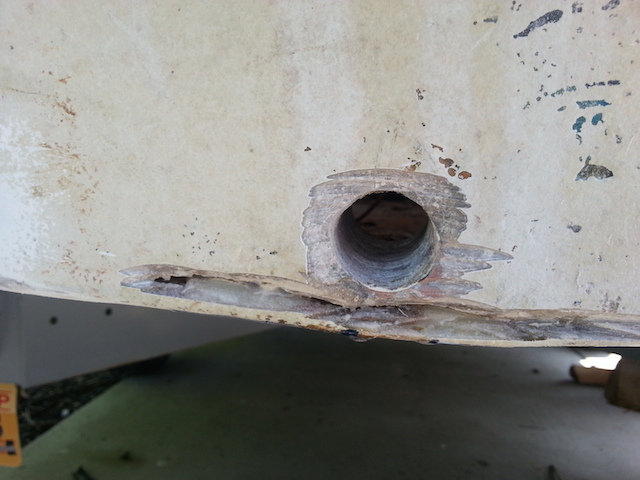
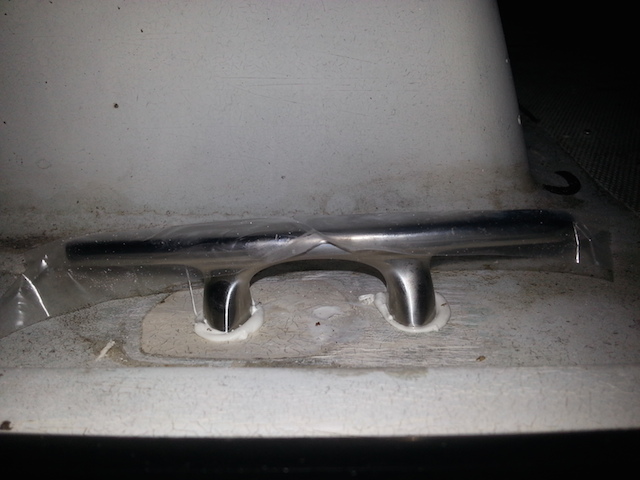
Here is the new brass feed thru for the splashwell! You can see the old plastic ones to the right. Had to use a tool to flare out the brass feed-thrus to make sure it was done right. Right after I installed it we had one heck of a rain storm. No water inside of the boat – success.
Day 13
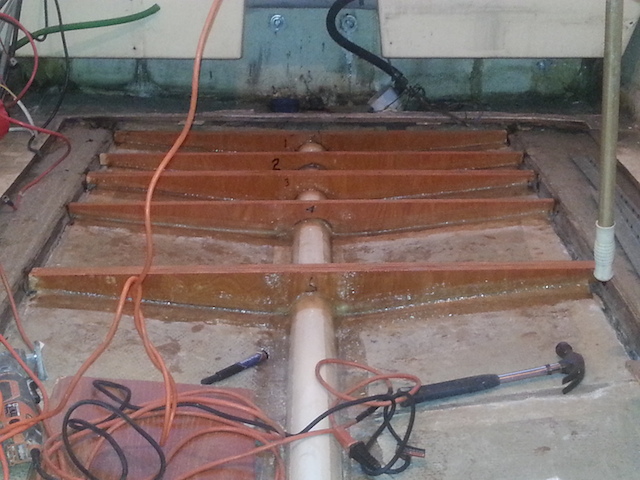
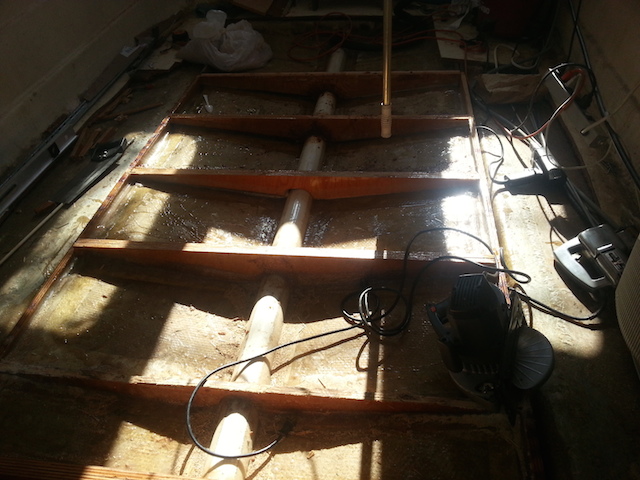
I successfully installed the two stringers and the balance of the transoms on the back of the boat. Everything is perfectly level using jacks, etc outside. Now looking at installing some of the floor in a few days. I can see the project coming together. You can see the fiberglass strips set-up for the install. Precut so I can easily install it.
May 25 Day 14
Ok, with 2 weeks of total work, things are coming along. I now have the stringers and transoms installed (to 8') and glassed in correctly. As well everything is level so good there. Now thinking of the floor, how to do the fill and also thinking about the prop pitch! Here is the floor drying again...
Day 15
Time to re-assess the project, if you are keeping up with this, the vacuum has returned... The entire back of Too Cute now has new stringers and transoms, all glassed in and.. level. Found several cracks where the hull in the back meets the transom, so doing some outside glassing to fix that. Will tackle the drain plug in a few days as well. If you are looking very close, you will notice the stern and the bow still have small pieces of old floor across the beam. That is to keep the boat from swelling outward. (I heard others' horror stories and listed to protect the hull conformity.) Once I have an 8'x8' floor installed, then I will pull the stern plywood out maybe the front as well. Oh, bought a new tool, a 4” grinder. Used that on the transom under the motor. It had a small crack in the hull – easy fix to find and to glass in. The lake water was so dark it was easy to see where the crack started and finished. Went a little more then what I needed to go but glass is cheap to fix a hole. A few more small holes were found by the drain plug and on the right side. Just a little more glass...
The fiberglass work on the transom is turning out great, sanded a little tonight, another light coat of resin, then went back inside. Cut down 3 of the transoms tonight with a sawzall and then using a new belt sander, everything is now sanded, perfectly level, and glassed again. The floor at this point is within 1/8” from the back to the front.
I figured out the area under the splashwells (inside) needed to be completely glassed in to “keep the water in” that area. That also will have the bilge pump in it again, (basically a sump pit). I am learning that this area is the “sump pit” for the bilge so it needs to be completely glassed in. The floor will have to wait for a few more days. Completed the glass work on the outside of the transom of the boat. That area is now ready for prime and painting of the hull.
After some grinding inside (under the splash wells..) I found some issues with the transom inside. In one place it was bone dry but never connected. Grinded away and glassed it together for the first time!
![]()
Ok,
Ok you old time boat builders/rebuilders know that I really tried to
fool myself but... after a good night of sleep, I returned to
grinding.
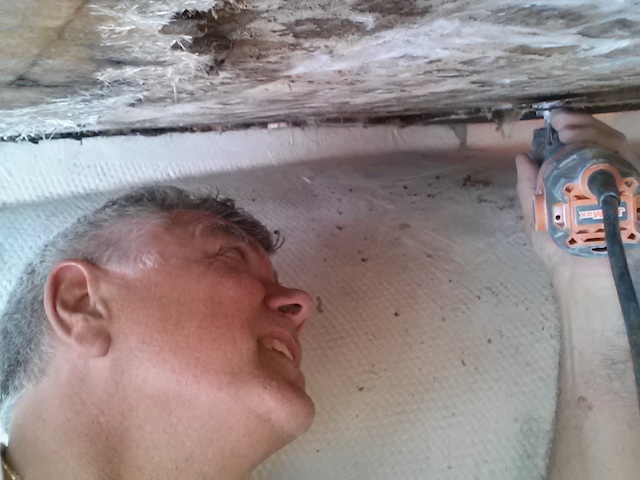
As it turned out... the transom was not connected anywhere to the hull except for the last 1/8” on the outside. Good grief.... The wood seems solid but.. I will let it dry for a few weeks before I glass the entire transom in. While doing so.. I am creating the well that the bilge pump will be setting back in. Glad I found this out now.. Here is me after 3 hours of grinding..
The area I was grinding for 3 hours is way behind me under the window. It is about 16” high by 2' deep if you are not familiar with a Hobo. You cannot see it but I am smiling... and Too Cute is smiling as well. She will be looking forward to some new adventures soon..
Day 18
I had a Symposium to do earlier in the week so no work. Back at it again.
![]()
Day 19
Lots of progress this day, the weather was about 60 so I got some major things done.
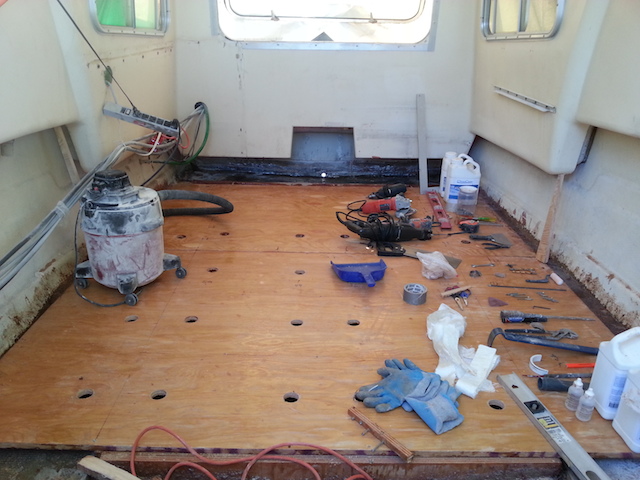
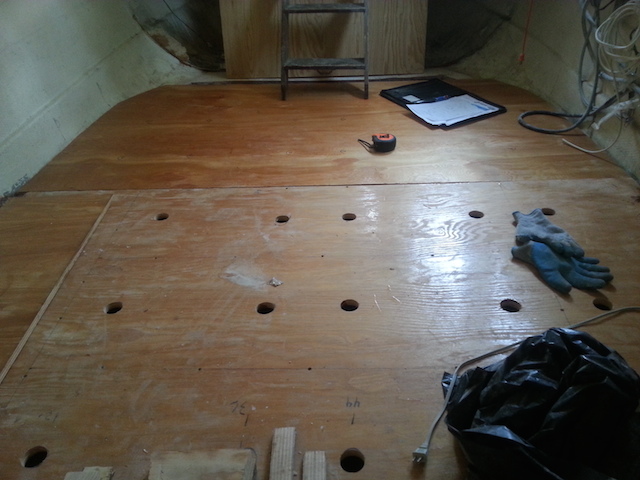
If
you are wondering about the holes... that is for the flotation fill.
The first attempt led me to understand how
that stuff works so I decided to wait till the deck is entirely done... then use that stuff. It expands everywhere so I
wanted all the deck in place before I used it again. Keep in mind that in 1974 when this boat was built, it was not a
requirement so Canada was ahead of us on flotation fill. I believe it became mandatory in the US in 1976.
You might notice that the stringers are missing. They are just 4 foot long.. I pulled them as well as the next three transoms. I have one more left (supports the front of the cap/door opening) and I am at the end of the transoms. This is actually getting easier as I go along. I am placing in doubles from here out to eliminate any bounce when folks board Too Cute. Oh.. the back and the center of the boat where the new floor is in..... solid as a rock – you would think you are walking on cement. I would believe when I add the floatation material under it will be even more stable. Success.
Day 20
Had the flu for the past week, nothing got done. Sunday June 22 hit it hard. Last three transoms in, last two stringers in... everything is level!!
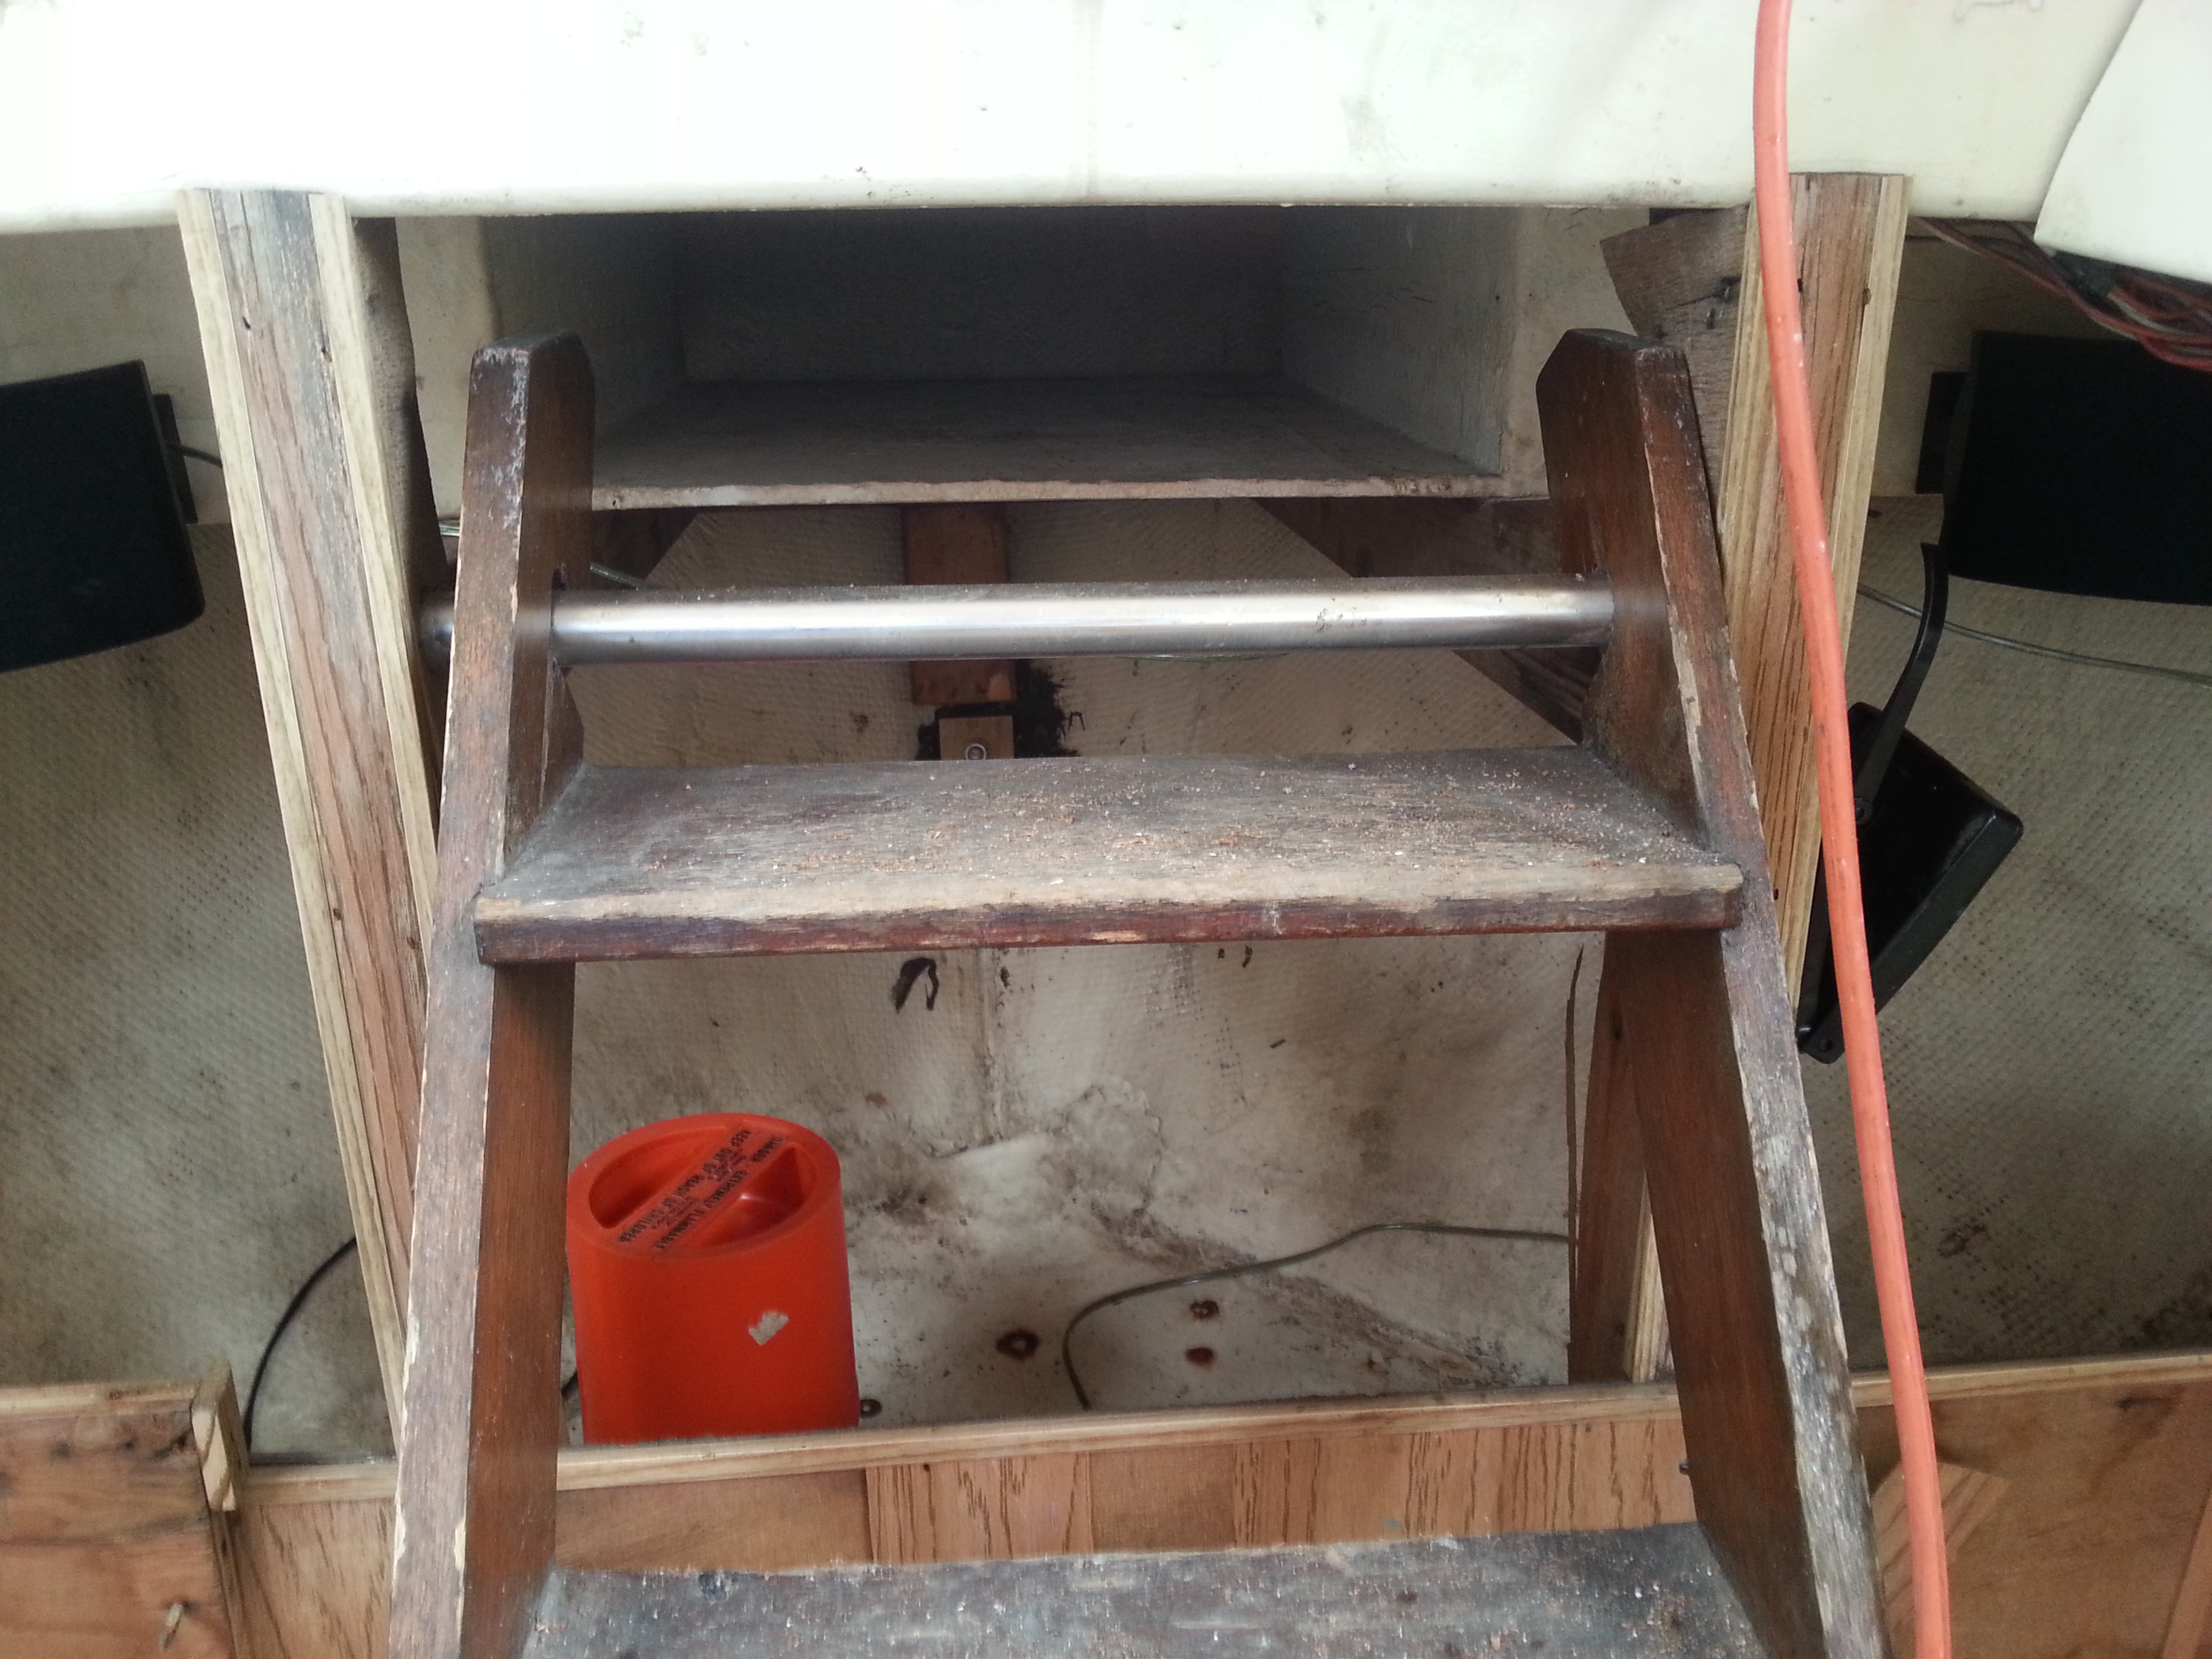
Note the additional (small) aluminum right angle pieces. These were from the original build. I spaced them more correctly as where the folks will be walking through.
Note, the first two on the top to where the ladder is placed. Again.. more stability.
At this point in time... time to take a deep breath. The hardest part of the Too Cute rebuild is completed.
I have a floor to build on that is stable, level and ready for the building of the inside. Also replaced the drain plug re-glassed, drilled and replaced it with a thread-on brass one – nice!

Day 21
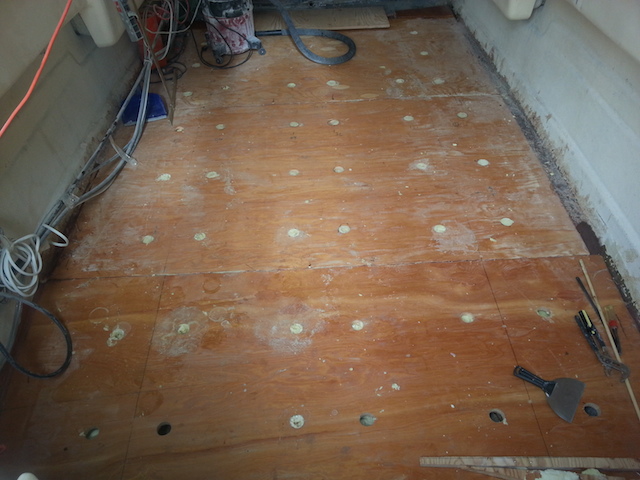
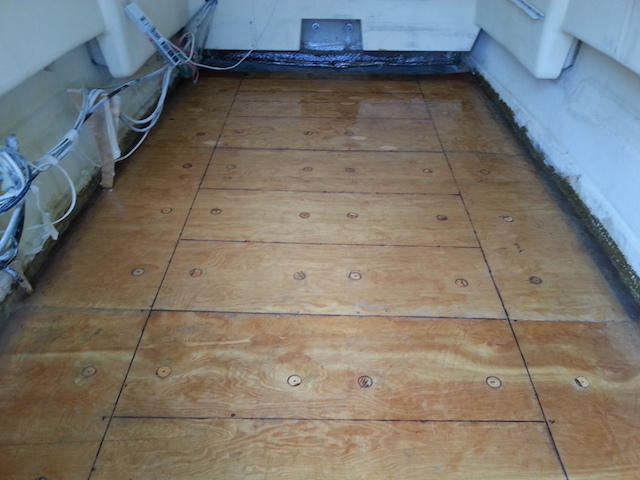
Filled the area under the floor with 2lb, 1:1 mix flotation fill, placed the 2” wooden plugs back in, glassed them in and ground them flush. Re-sanded the entire floor, filled in the holes a few times and ground them flush again.
Day 22
Good weekend to get work done. Final two layers, one lightweight 4” and the second one, overlapping but off-set 3” very heavy matt on the sides where the floor meets the hull, filled all the floor with flotation material, then placed the 2” wooden plugs back in, glassed in the last transom with it's final coat. Marked all the transoms and stringers for future reference. Burned out another belt sander, looks like I am done for the weekend. Looking great!!

Day 22
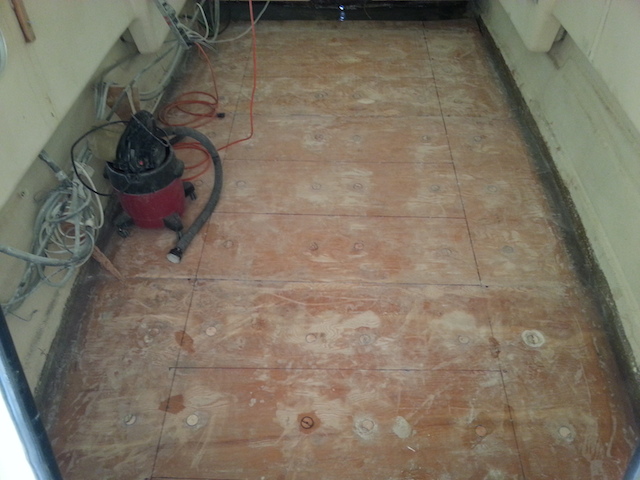
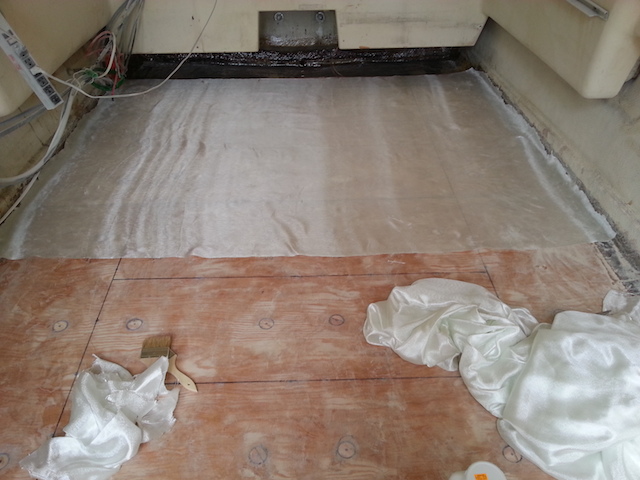
Final dimensions taken for future reference, placed layer of fiberglass down the entire floor. And a final layer of resin.
Hard to tell in the second picture but.. there is a layer of fiberglass everywhere.
Day 24
Four layers of resin with color in it to make it white. Belt sand, vacuum, repeat. Looks like it should now!
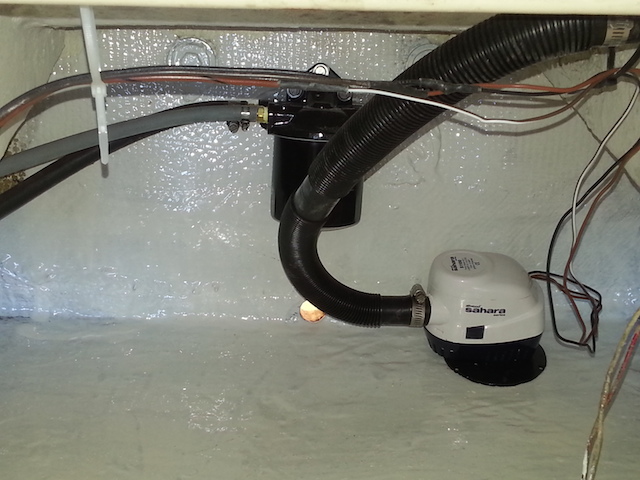
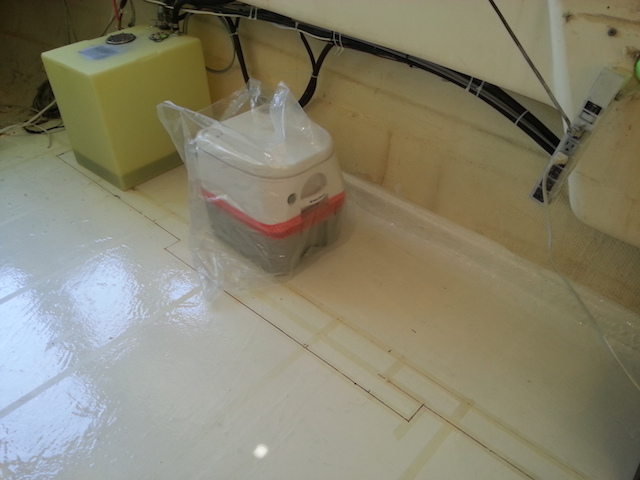
Installed a larger, 1100 bilge pump, new fuel separator, gas tank. Re-installed deck fill, outside vent, and started on the wiring. Learning the color code for “old boats” - a new experience for me. Along the way, sealing with 4200, etc. Back then.. remember this is a 40 year old boat... I think they used plumbers putty! Look at this area of the boat as a sump pump pit. It will have a small amount of water in it but.. that is... where it is supposed to go if water goes into your boat. The bilge then pumps it out to the splash wells then through the feed thrus to the outside water.
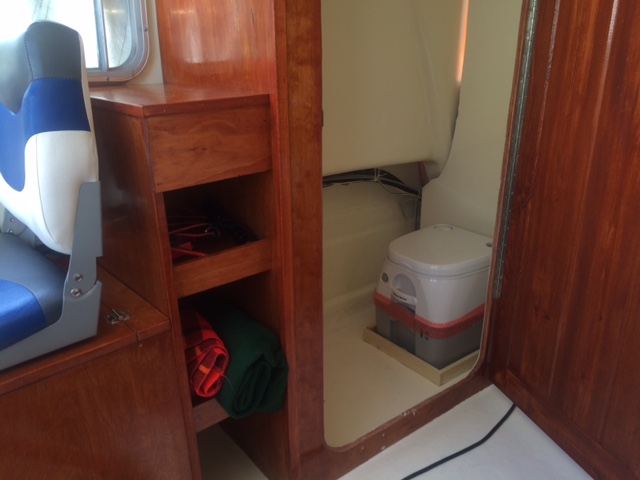
Hopefully this weekend start the engine, etc. can't wait! Soon, install the porta-potty, etc. This time around... Too Cute will have a bathroom!
Took the entire rats nest and using cable ties, neatened up the entire boat.
Day 25
Turned on the new 90 HP Mercury for the first time, new hoses, new bulb, new gas tank. All getting ready for the water!
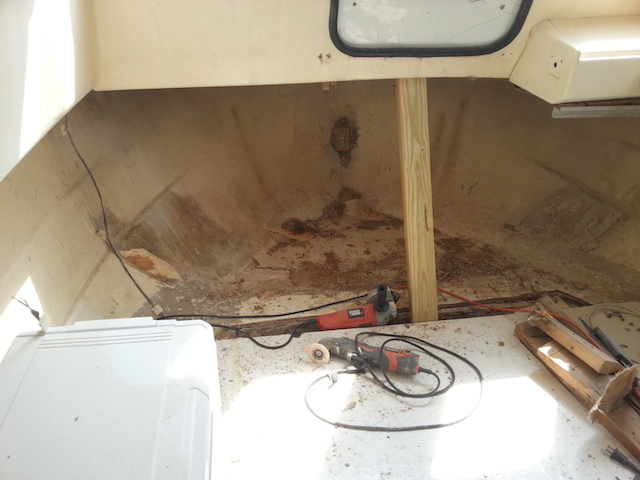
Finally tackling the bow of the boat. Found out why the deck was not solid. Remove, grind, and replacement is in order for all the wood under the bow.
Day 25
Too tired to post the last of them from Sunday... I used a high power LED flashlight (from the outside) to see issues that needed re-glassing inside.
I was originally going to wait till next year to do the bow but.. glad I did the bow this year before splashing Too Cute. The bow of the boat takes quite a bit of abuse – it was a wise choice to do it this year!. I plan to re-inforce the bow / deck a little more then what it was previously. Note the brace in the center while I am working on it! More slush to get out.

Day 25
Holes illuminated (from the outside) by a high power LED flashlight, are marked for investigation, grinding, glassing etc. this weekend. I glassed them from inside first, then ground and glassed them from outside.
Day 26
Friday night, as I ground down the hull under the bow, it was clear that I needed to open up the front of the floor as well. More grinding.. Good thing I did that, all that area (hull) needed thick matt as well as new glass. Did find one “hole” and one area that needed new matt (went all the way through). After.. I installed the tube. Tube now new and complete from bow to stern.
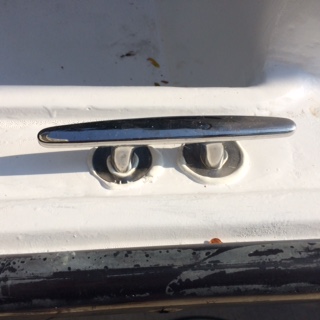
Ground the outside down (where it was beached a few times..) and placed some heavy matt on the areas that needed it. Had some time to pick up some new massive cleats from Kendor in Wisconsin. This week away in Raleigh, NC for a Symposium. Back to it again next weekend. All cleats now have new plywood underneath. 5200 liberally applied everywhere.
Day 27
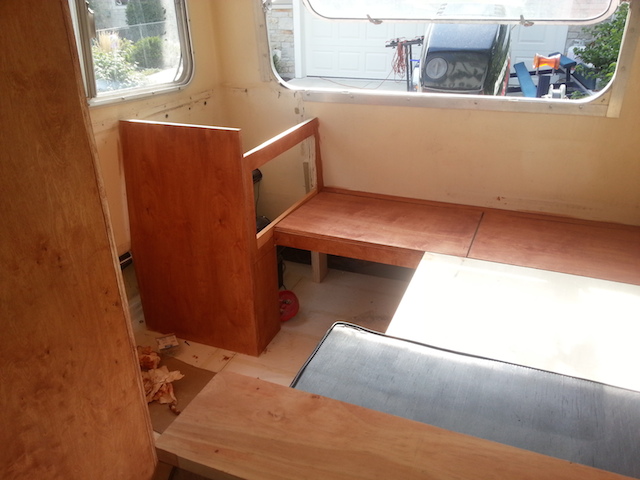
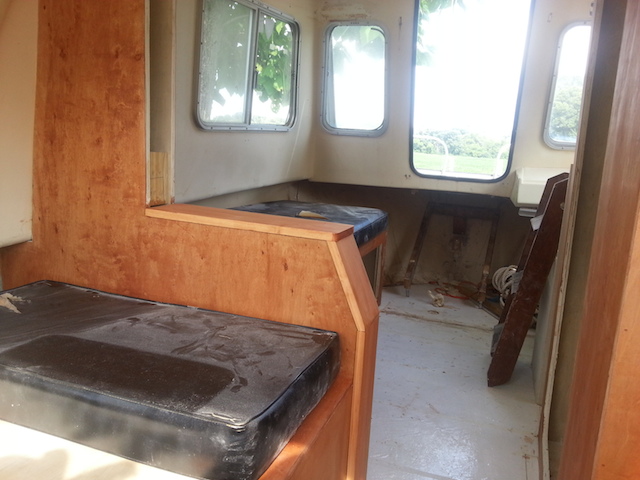
Sometimes you “got to hire a professional”. In my case, all the work you have seen so far is “me”. But although I have degrees in engineering... I am not a finish carpenter. Mind you I built my house in Wheaton but.. sometimes you have to hire a professional. That was a wise decision. You will see the end result probably the end of september, the carpenter had some truck issues so some delays in getting that “finish look”. I enlisted a good friend of mine (and did pay him - he has a family as well) to do the finish work which included this..
So.. if are you ready - here we go on the last phase.
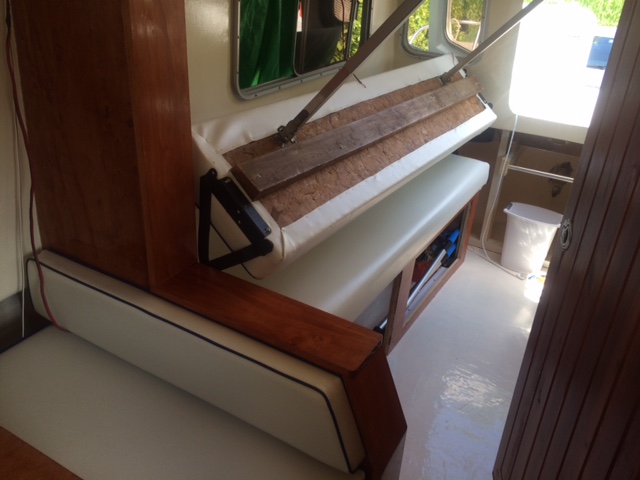
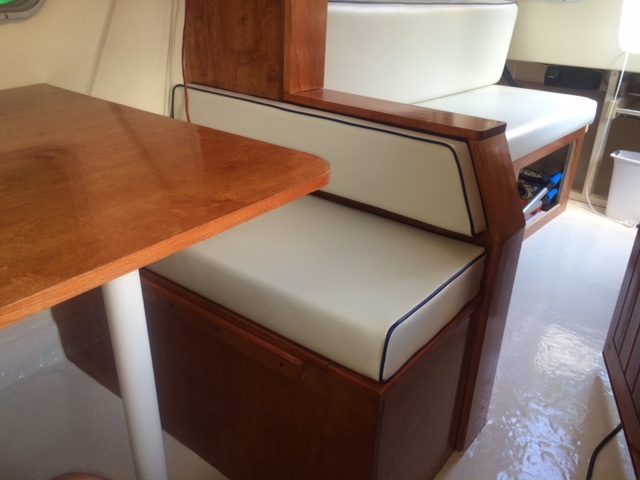
I
decided to put the bed in with it's original bracket. I have not seen
any Hobos left with this bracket, certainly one of a kind! It flips
the seat back into place as the bed and the back actually spins in
the air. For this Electrical Engineer this is a mechanical
engineering feat! See pictures later when it is assembled.
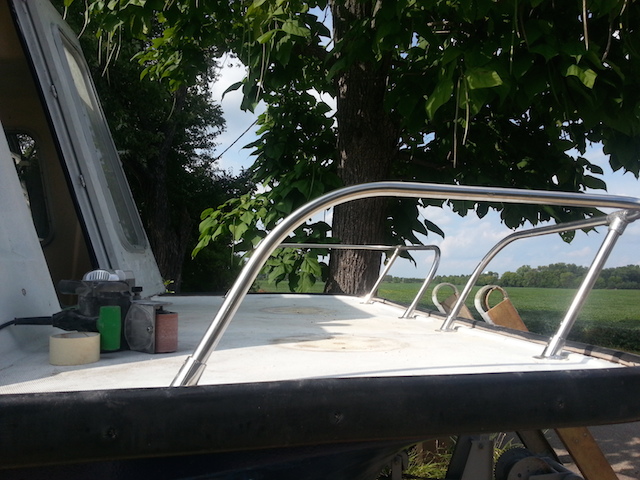
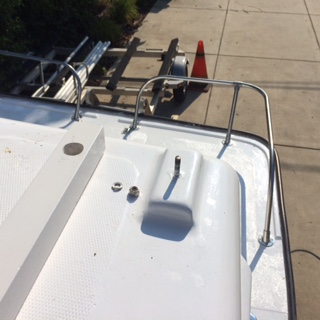
I also found some NOS stanchion mounts for the front deck. Will rebuild the rail this weekend. I did use new wood to capture the cleats, well worth the time to rebuild that segment. All looking good.
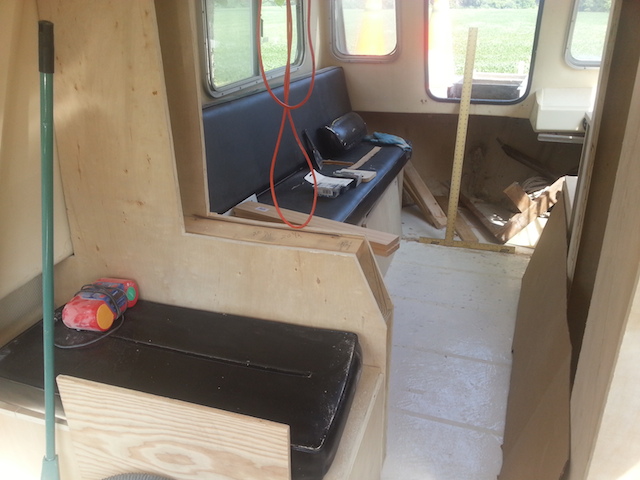
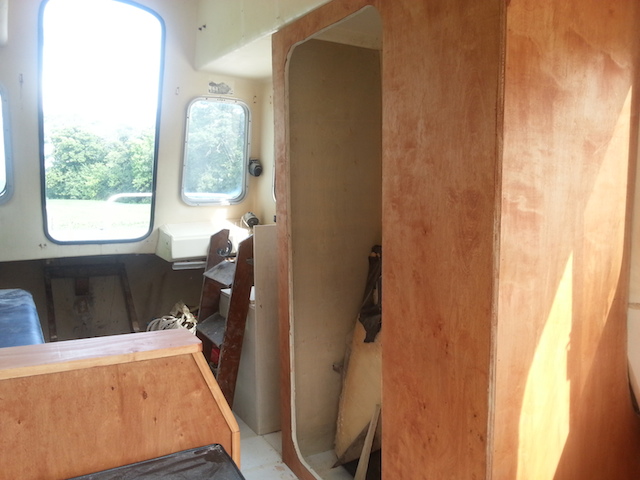
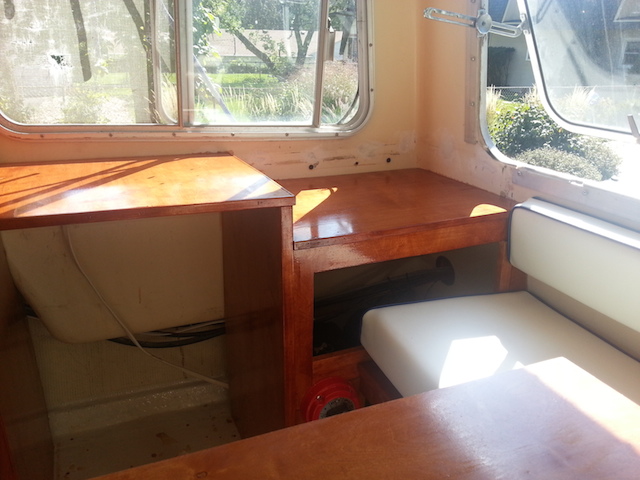
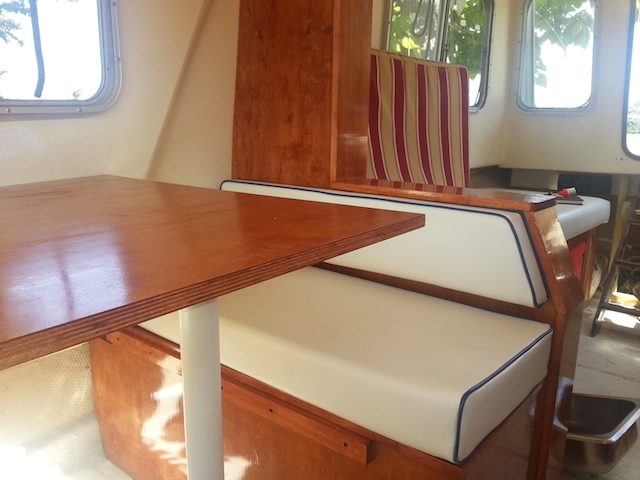
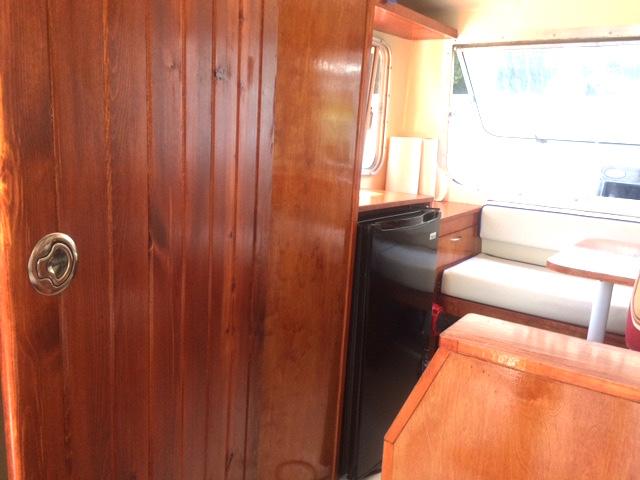
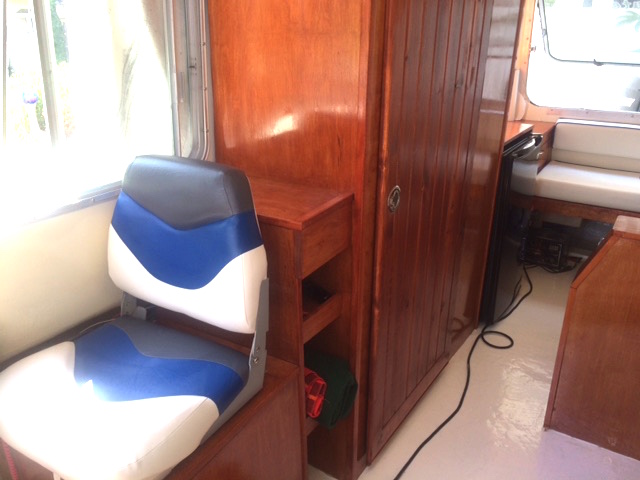
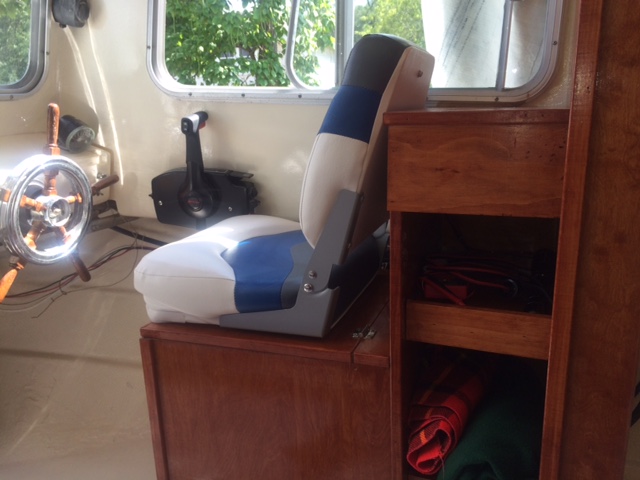
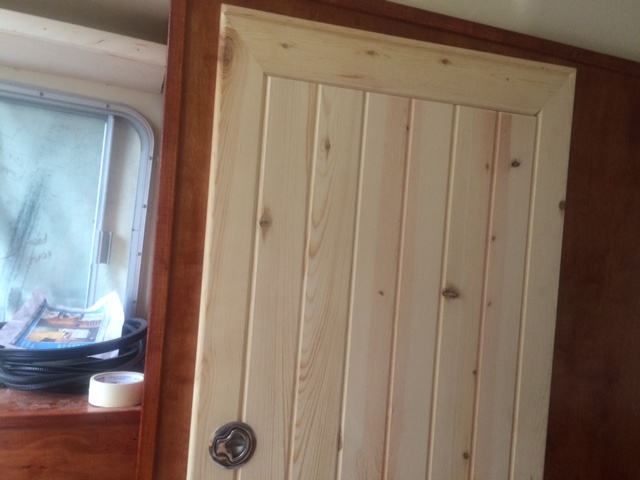
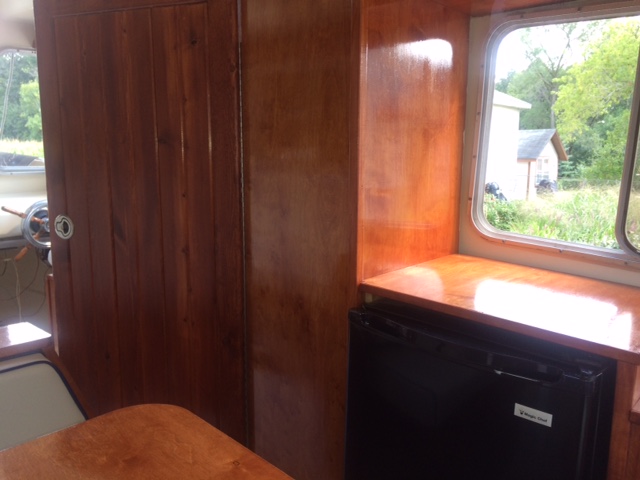
Here is the work of a real carpenter. Note the new enlarged bathroom with a nautical entry! This time with a porta-potty!!! I opted for the larger one. We raised the bed in front to be higher so folks can see out the window! The seats in the back we raised slightly, again.. same idea. The old cushions are for reference only.. Last picture is of Bill our Master Carpenter.
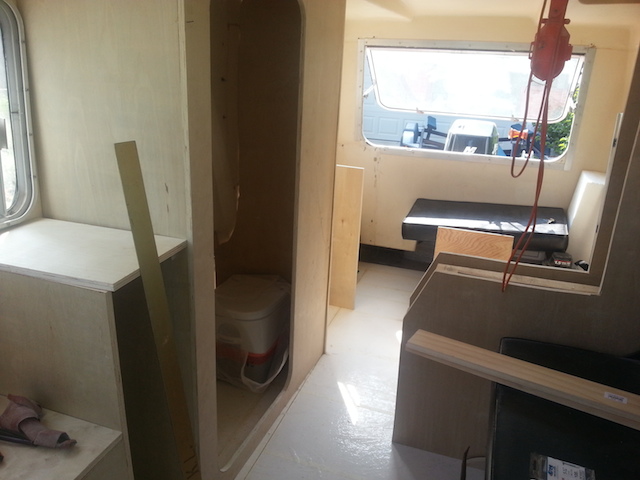
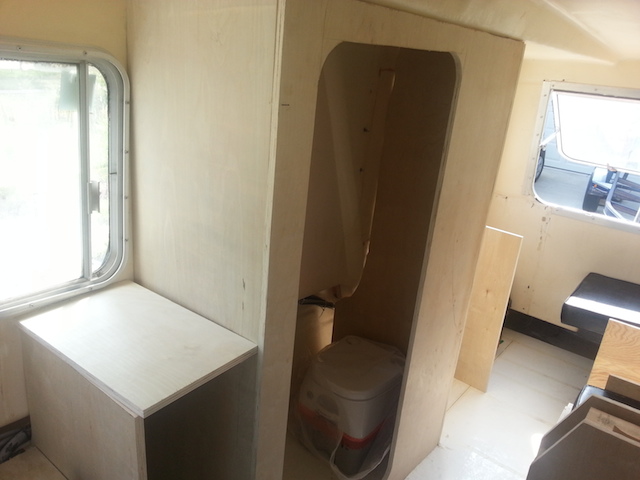
I enlisted friends for the carpentry after I did the floor. Yes, I did pay them..

Major Set-back yesterday, my First Mate Ida fell into a seat that was still in process.
Many hours in the hospital yesterday, broken rib..... lacerated arm.....
Some much needed rest ahead for Ida...
Day 28
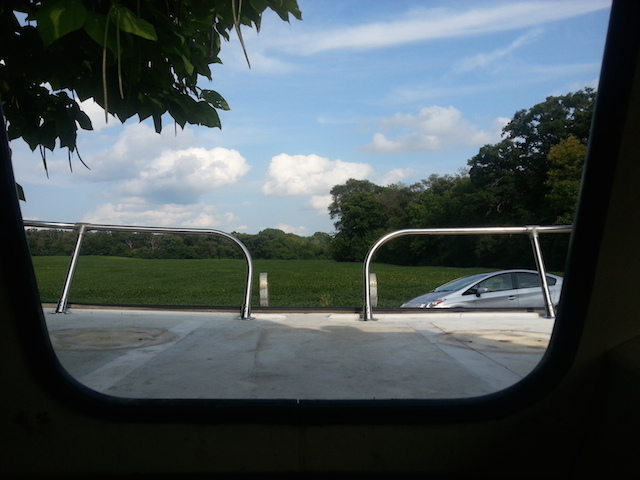
These stanchions just look beautiful! They are the original ones built back in 1974. Found out the difference between “cutesie chrome and massive, survive time stainless.” The rails are original! Almost no sign of abuse, even after 40 years! All I needed to do was to purchase new mounts for the deck, rebuild the plywood where they mount, glass the plywood in and there you go.. Looks like when it was built in 1974! Extremely strong!
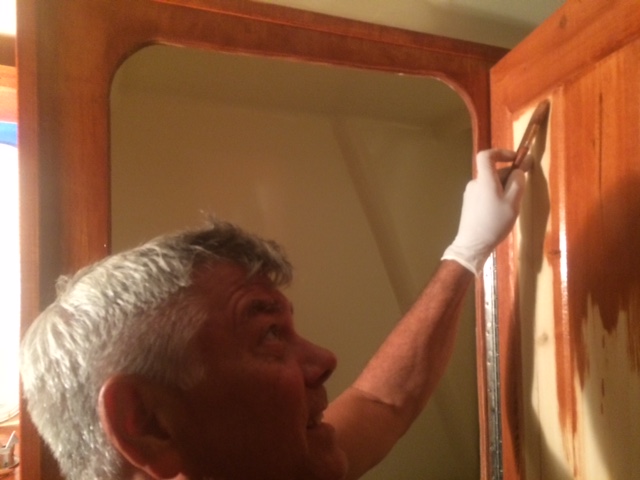
And the staining begins...
I did all the staining and varnishing.
I was taught by a pro – my father.
He was a professional painter, he did excellent work – showed me how to make it look right when it is completed.
Using spar varnish - three coats were required. If.. you ever have time (who has that..) research how Rust-Oleum was founded.
(A Captain at sea that started it. The things you read when waiting to pay at a big-box store. The story was on the spar varnish can.)

Day 29
Lost some days to post, but most of my spare time at night, etc was completing the punch list. Needed 2 coats of stain to get it right, several coats of spar varnish. Lots of wiring items to complete, etc.
Hooky Day “Too Cute” will be getting wet!
Wiring AC harness before installation onto the new home-built panel. Again, Kendor was my house for parts. I used many heavy-duty parts from much bigger boats.
Cost was minimal as they are a NOS parts house of “extras” from parts suppliers.
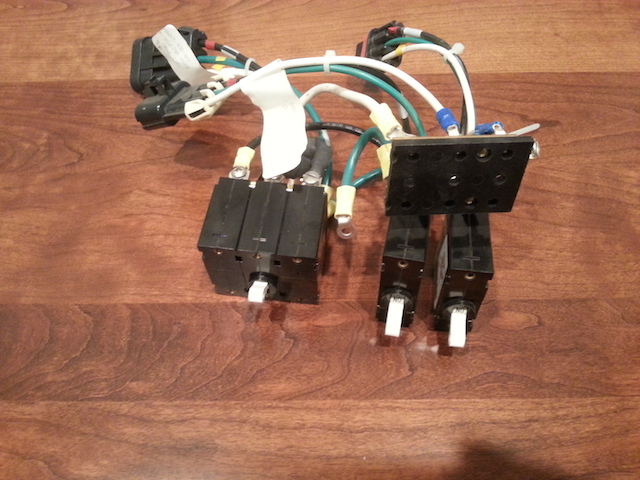
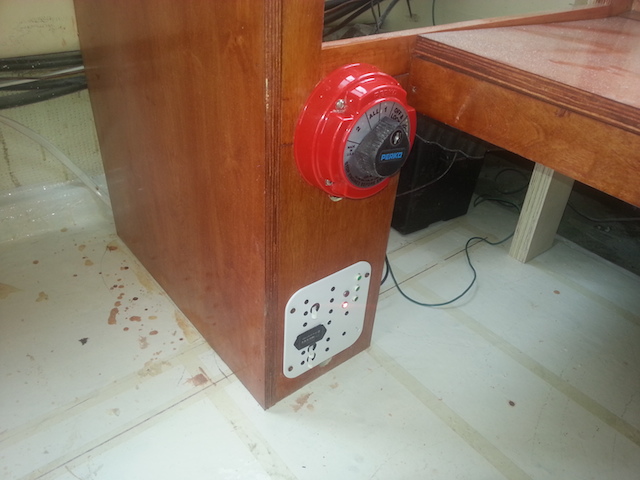
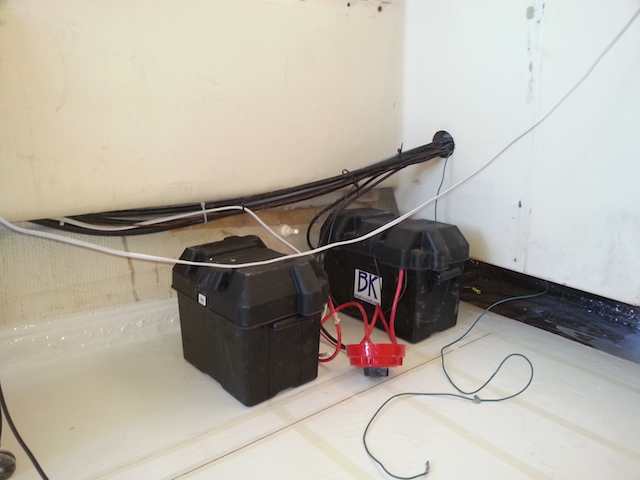
Note
the PERCO switch has selection of battery #1(only), #1+#2 (both) and
#2 only selection. For batteries, I am using a Model 24 and a monster
Model 29 for accessories. The home – made panel below the switch
has indicator lights for DC (connected), AC shore power, Warning for
incorrect shore power, AC for outlets and for the future shore
charger for both batteries. I also have an hour meter that I added.
Next
year for the inside and outside painting, got to get some numbers on
the hour-meter!
All ready for the fall boating season. Note how much lower the water level is on the stern! Evidently the work was well worth it!
Day 30
Miracle Day.
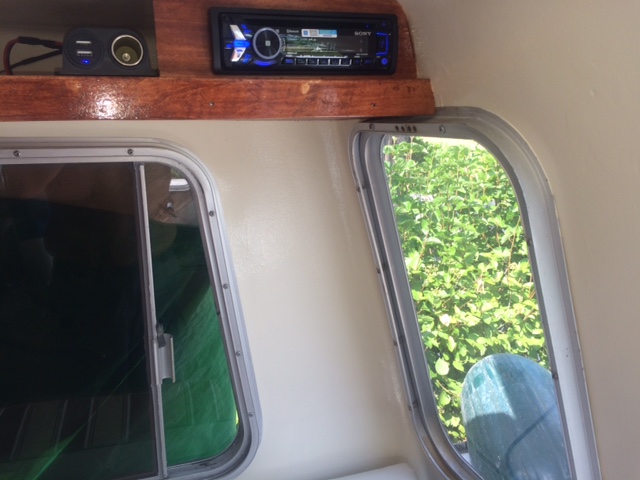
Today, all the loose ends were tied up.
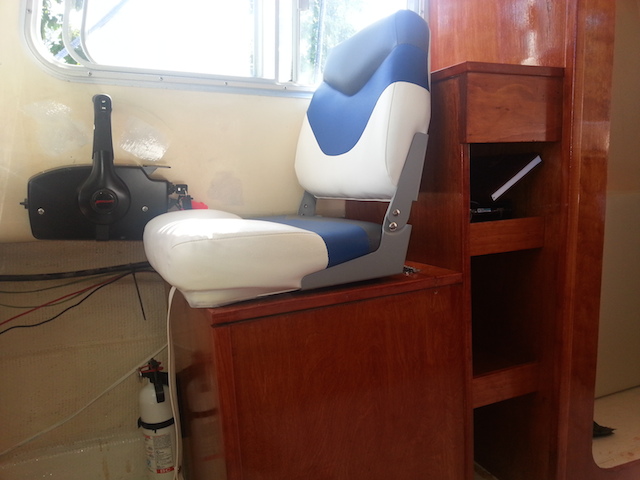
Speakers mounted, radio powered up, seats placed inside, table setup, cabinets set in place with cleats, tabletops installed, bed installed, Captains chair mounted, engine run for 20 minutes, last segment of wiring completed, navigation lights replaced, all AC and DC wiring checked and re-checked, safety grounds checked and rechecked, seats installed, stickers applied, see pictures below. Engine fully tested again.
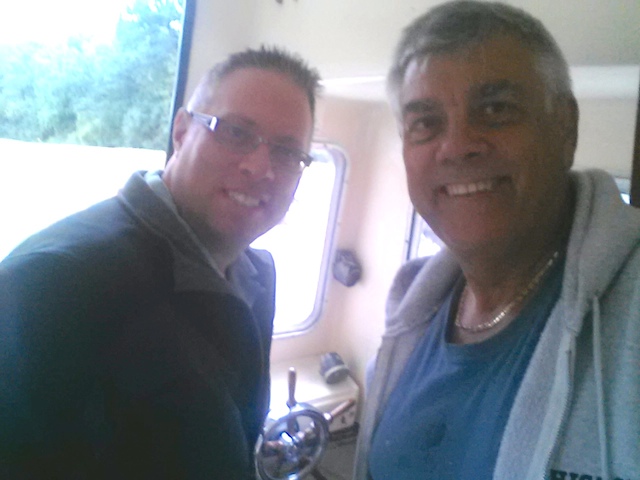
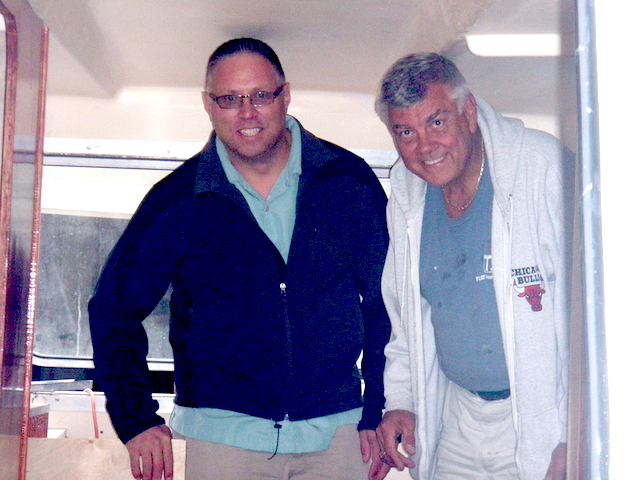
Here is a picture of the past owner and a great friend, legend of the Chain, Rodney McManamy working on the Captains chair well after 5:30pm. He actually flew in from Arizona and then drove 2 hours over to help me with Too Cute.
Brian McManamy (Rod's brother) was there earlier in the day and helped with the engine! What a great team they made! Could not have done it without them today.
Tomorrow is Hooky Day, we are ready!
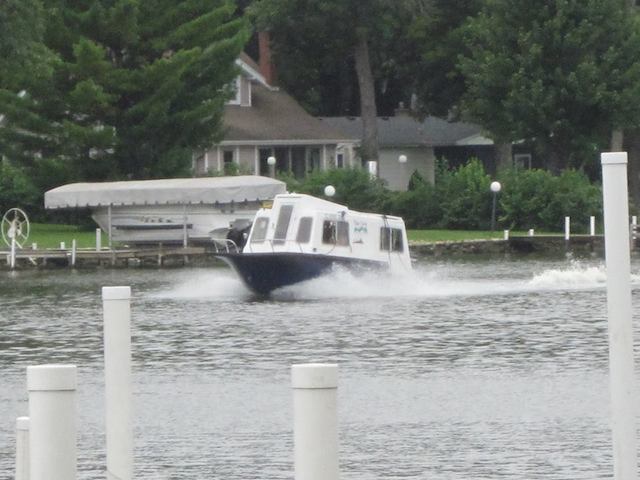
Hooky Day – 2014 She splashed - Day 31
With 31 days (over a six month period) she is water ready.
We decided to do a 60+ mile trip on the Chain of Lakes.
I felt confidant that she would perform, pretty much everything that was related to powering her, was “touched by me”.
She performed perfectly as I expected.
In front of about 50 of our boating friends, Captain John Bryowsky held a ceremony to christen “Too Cute” back onto the Chain of Lakes. Even Captain John got christened.. Probably my best day of boating – ever.
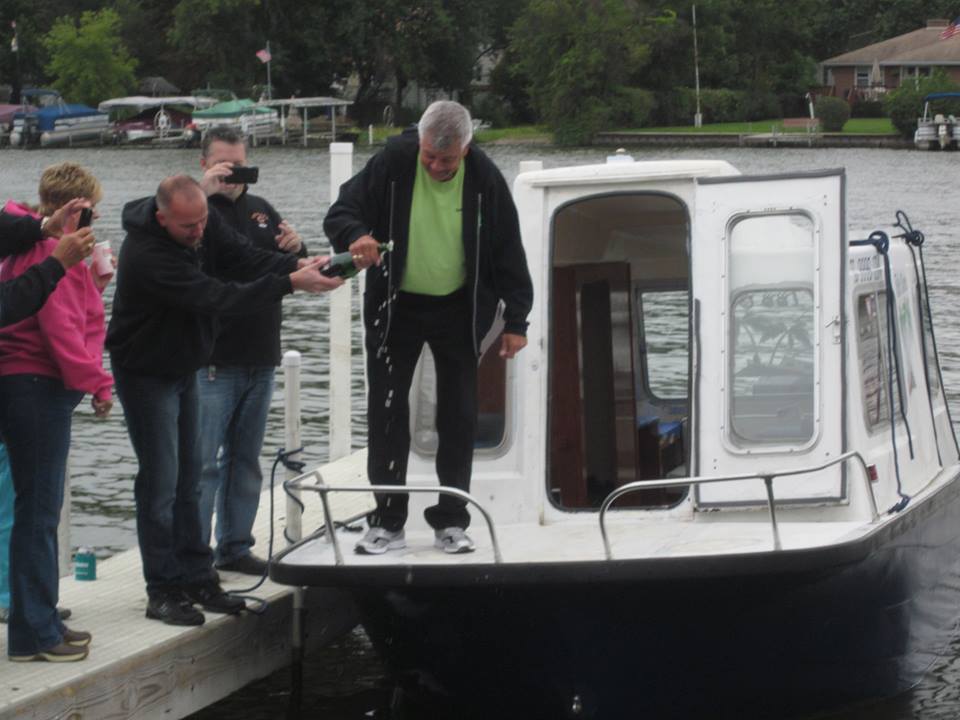
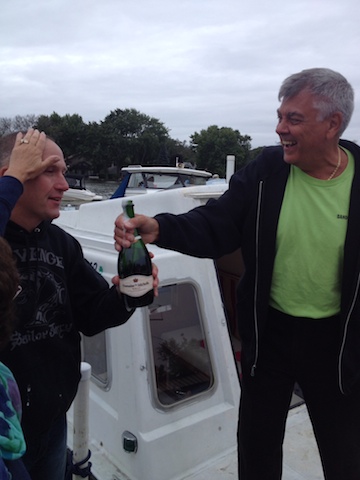
(I
am still smiling some 48 hours later...)
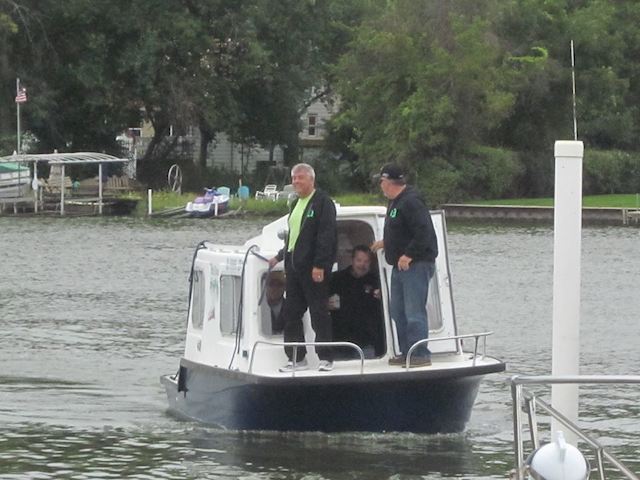
Too Cutes' first crew consisted of Ida, Rodney, Steve and Karen, Paul and of course.. me.
Captain Rodney handing the keys to Captain Frank
We then enjoyed the company of our closest friends (for over 30 years!) Steve and Karen as we motored away on a new adventure for the Krozel's.

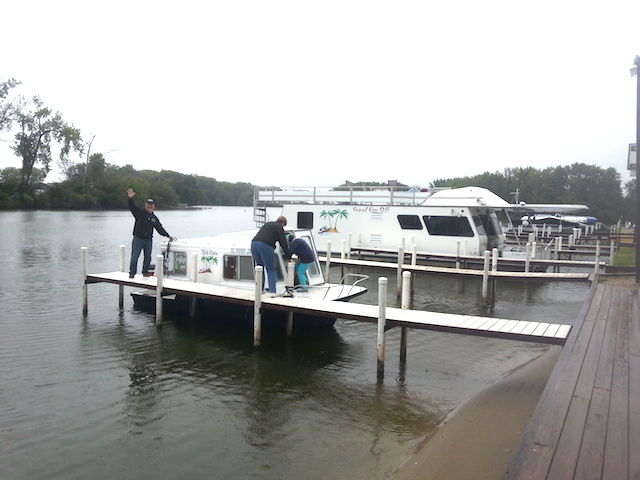
Too Cute with the Mothership, Goof Fin Off.
Note the logo's are similar. Gary and Amber also own Hobo #1, Cutie, in addition to Goof Fin Off.
Not pictured is Hobo #3, Cutie Pie, owned by Don and Pat.
We are all on the Chain Of Lakes in Northern Illinois.
Bringing her in for the first time.
Sadly, this chapter is now closed.
It was a great adventure to rebuild her – she is good now for another 40 years.
I hope you enjoyed this journey as much as I did.
Yes, there are more things to do to her but..
I have a lifetime to complete them in the spirit of the fun that I had rebuilding her.
If you see us on the Chain of Lakes in Illinois / Bluff Lake.. wave or stop by to swap some boater stories...
See ya on the water.
Frank Krozel September 14, 2014. frank@electronicinstrument.com
2015 -
Updated August 26, 2015
This year was tough to get
started on Too Cute. Even though another joined the ranks here on the
Chain of Lakes, I did not jump into the game early. Probably because
I knew the task at hand was going to be very difficult. The two major
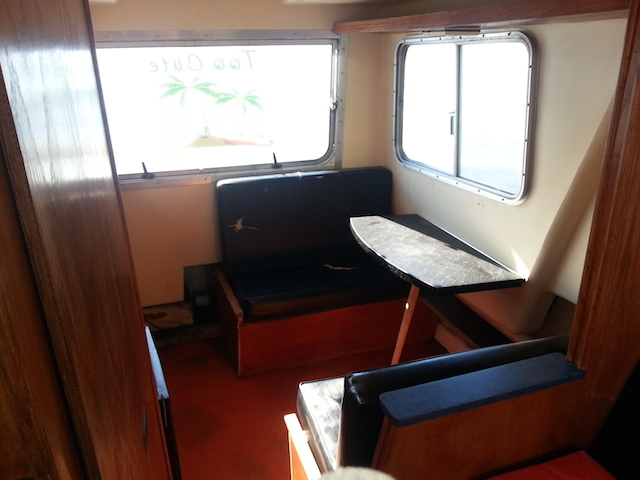
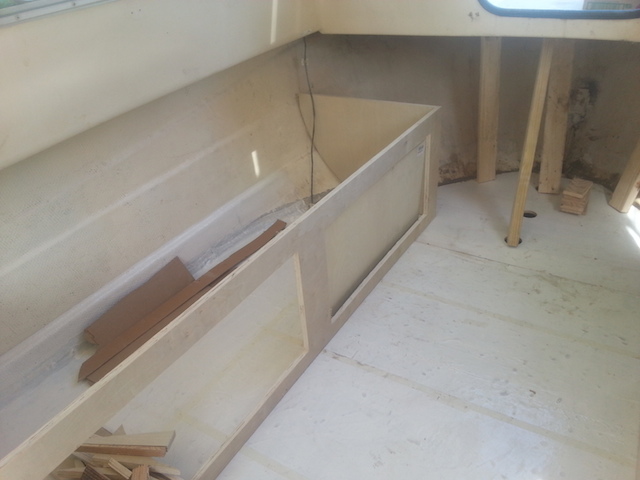
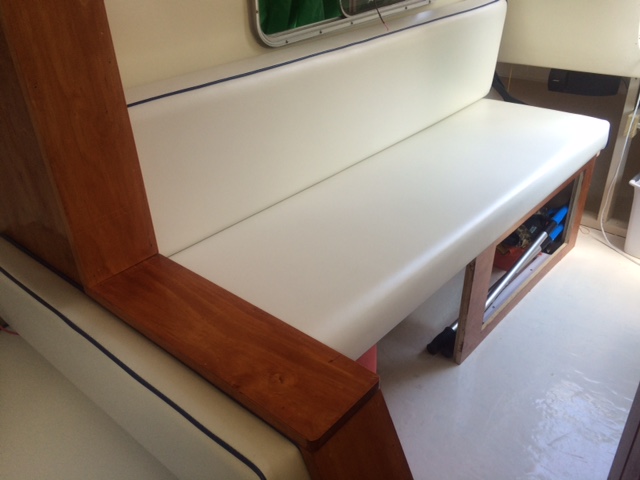
items were the couch and the shelves. The couch had two unique brackets
that convert the couch to a bed. I have not seen these on any other Little
Hobos - I assume that the past owners had issues with them when re-installing
and eventually threw them away. Persistence pays. See the
pictures!
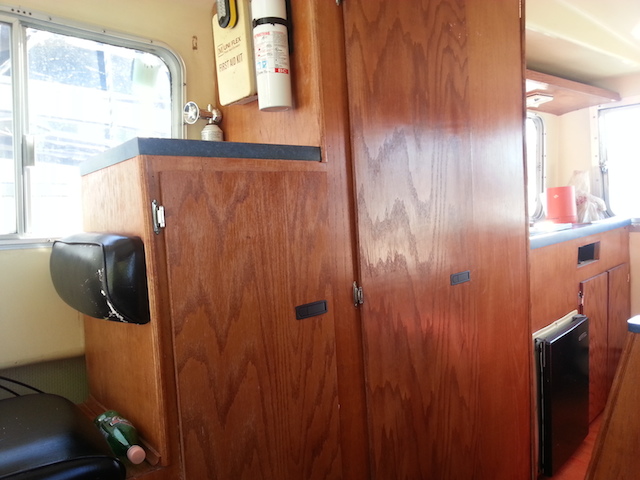
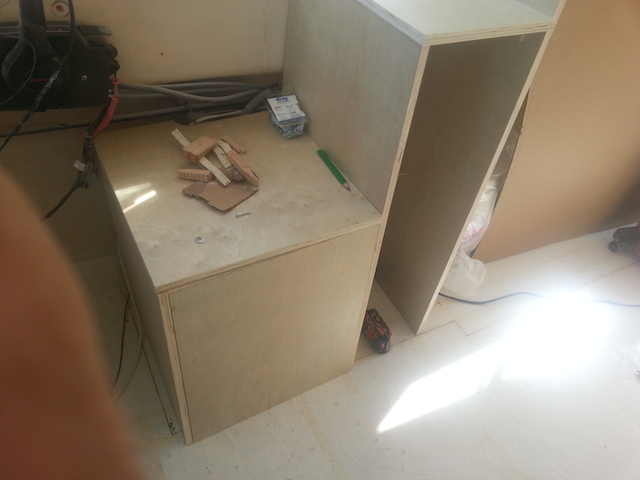
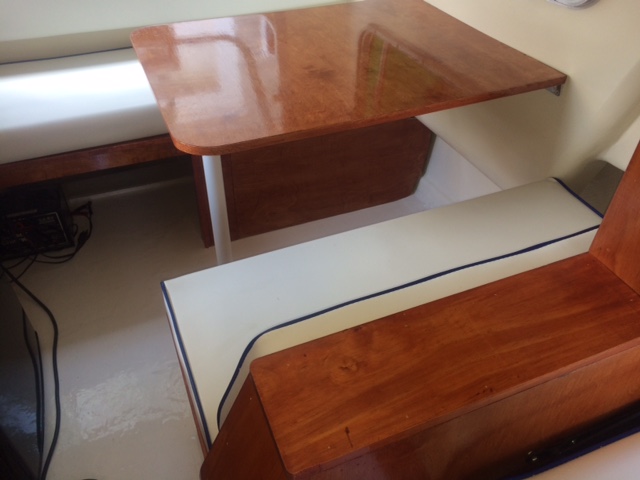
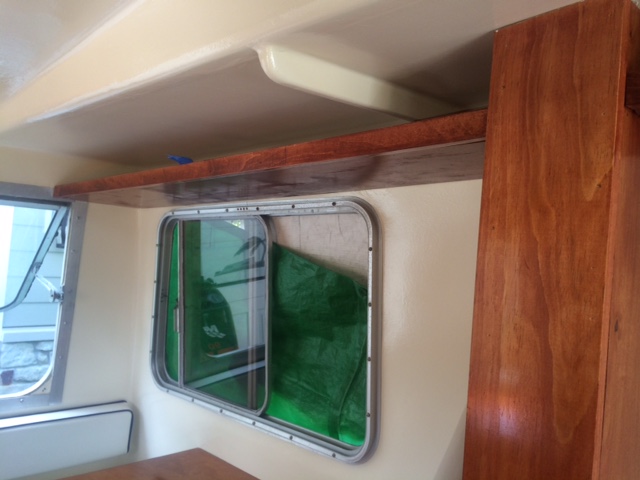
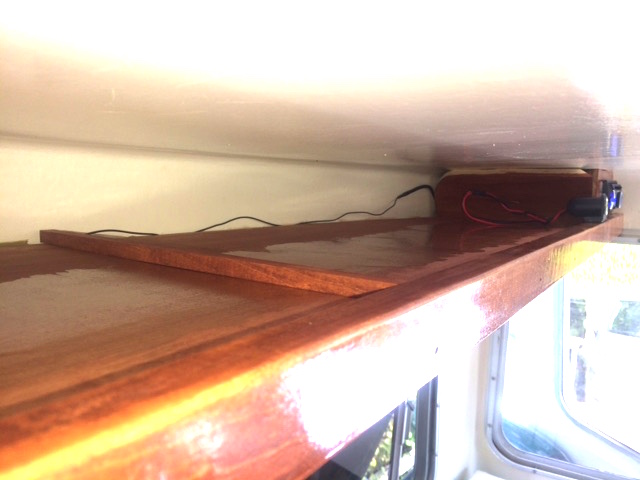
The other item was the shelves. They are almost impossible to design and
build them into the existing slots.
Again... persistence pays. When I finished the inside.... I decided to do
"one more gelcoat for the floor.
In the end.... I am very happy with the way that the inside turned out.
Next year..... the outside. -enjoy...-


Updated August 3,
2016
Interesting.. it seems that I
launched last year's update just about the same timeframe. So.. what happened
this year?
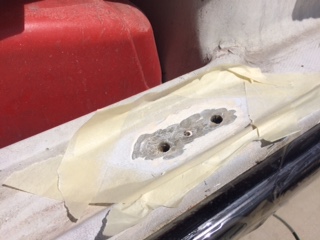
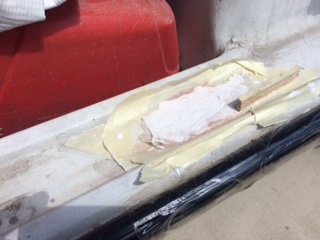
Well, it started with me having to re-glass the holes
where he cleats were. On our lake, I hurricane-tied Too Cute last year and
the waves beat the heck out of the cleats. So, I pulled all 4 out, cut out
the existing plywood, re-classed new thicker plywood and put large washers
on both sides so I would not have to do that again. The hardest part was
the starboard side stern where I had to pull the batteries out, and get under
the splashwells to work on it. But this should be the last time! See
the pictures below.
Then I contracted Shingles (get the shot folks) which
took me out for about a month before I could get started again.
Oh, of note look
at the middle picture. You will see a huge stress crack in the upper right
corner. It is unclear to me but I think that is caused by a larger motor
stress. If you look at the right picture I re-enforced it and re-glassed
it. Don't think it will come back again. (Four places)
July 2016
I was just about ready to put Too Cute in the water when I noticed a small crack on
the transom, port side. Of course a "crack in the paint" is much
deeper. That started the "big job". So grind grind, grind
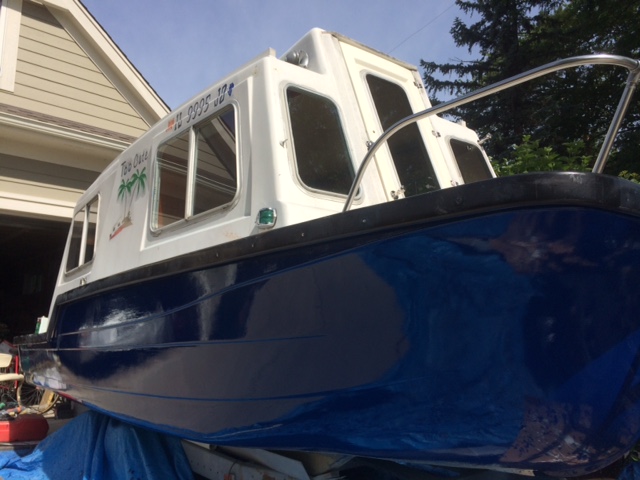
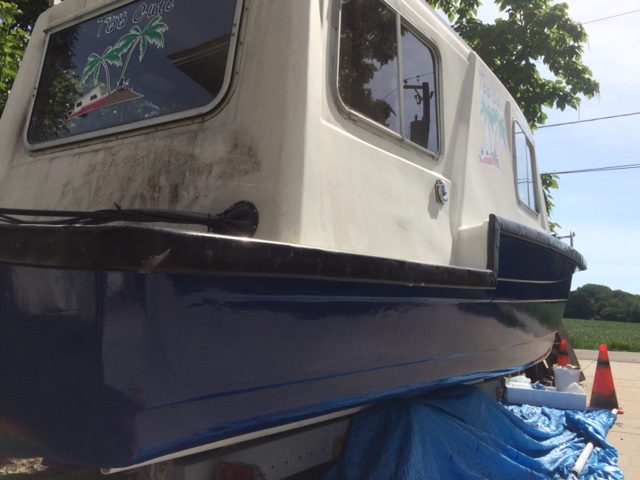
and re-glass. That required the transom to be re-painted, and it looked so
good that I decided to do the rest of the hull.
Some glass repairs along the way - it was well worth it.
![]()
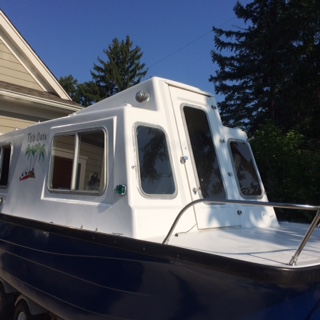
The entire hull looked horrible. Needed to sand it entirely.
It was sanded and brush-painted to get the paint to stick good. Turned out great!
With the hull completely painted, of course the cap looked dull. In addition there was some "troll marks on top that I got sanded, painted. Two coats of Pettit EasyPoxy did the trick.

Along the way, I found NOS marker lights so I pulled the older ones out (probably original) and replaced them with NEW NOS ones. I also raised them up about 10 inches to have better visibility for night boating. Of course new wiring throughout. LED's look good.
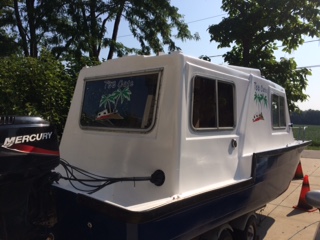
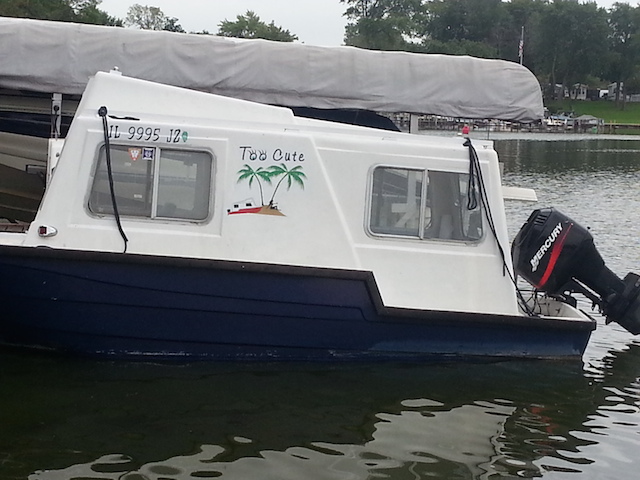
You will notice that the cap still has the original logo. Apparently when the logo was done it was "tapped and applied", not a decal. So some careful painting and the logo was maintained. Winter project for me to draw a new one. I guess I will become a graphics artist this winter.
The top rails
were unstable, very wobbly and in need of repair. I glassed in the studs
and replaced the rails again on the top. Thinking of next year to paint
them blue.
By now you are seeing the paint becoming dirty. Here in Antioch, we have
not had rain for about three weeks now, dirt is eveywhere. I typically
wash the boat every week, it needs it again. Our water for our property is
now being ported out of the lake via a pump. Oddly enough, just South of
us about 5 miles and North of us about 5 miles they have enough water.
Giddia-up, Hooky day is FAST approaching.... I gotta run more pictures after it is splashed.
Lessons Learned
Even the small multi-tool is good for “certain things” but... when the grinding got “real” I needed a 3-1/2” grinder. Buy a good belt sander as well. (I burned through 2 in the re-build) Unless you are just doing a small job, you need a “big boy” belt sander.
Research, Research, Research...
I gathered information (and am still in process of doing research from any source you can... talk to folks that have done it. Avoid the pitfall of just listening to one person or source. I discussed this with local folks, iboats.com, etc. This was the best resource I found, with 33,000 users. http://forums.iboats.com/forum/boat-repair-and-restoration/boat-restoration-building-and-hull-repair
Discard receipts...
Unless you feel you may need that down the road, don't think.. even for a minute that you will re-coup any of this. This is for the love of your hobby.
Enjoy the time on the boat as well as working on and in it..
This is “your” project...
Unless folks are related... it is your project – have fun!!!
Credit where credit is due.
As this progressed along, there are several folks I want to thank.
My wife Ida for listening me for hours at end on the Adventures of Too Cute, from about 3 years before I purchased it through this rebuild.
Brandon, our Son... for his help whenever I needed it.
Rodney McManamy
(the past owner) for the hours of consultation along this path
Brian McManamy for the driveway help as well
Monday, May 24, 2021
We moved to West
Chicago and of course the Too Cute came with. Well not exactly, we stored
it in a mystery location owned by Rob Hardman (Blarney Island, Port of Blarney,
several Key West ventures, etc) where she sat for a few years while we got the
West Chicago house up and running. Rob must have loved the boat, he
purchased the 90HP 2 stroke, LOL
So the adventure restarted with the "search" I purchased a 40HP
EFI 4 stroke found in Indiana. Very hard to find so when I got the lead, I
jumped on it. Had to drive the Too Cute some 700 miles to get it and I had
it installed on the Too Cute by a local marina. Then the real work
started. Had to find the elusive control cables and after finding a new
control, I purchased two new cables. Help from Dave at Fox Lake Harbor on
identifying the correct numbers and taking back the wrong cables
(twice).
Of course this meant redoing the cables, etc and adjusting the cables so F and R
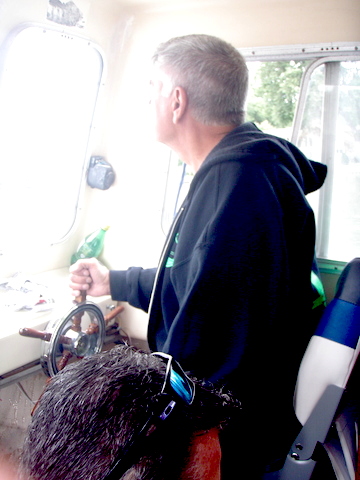
worked perfectly. Not that hard, really. Looking at the original
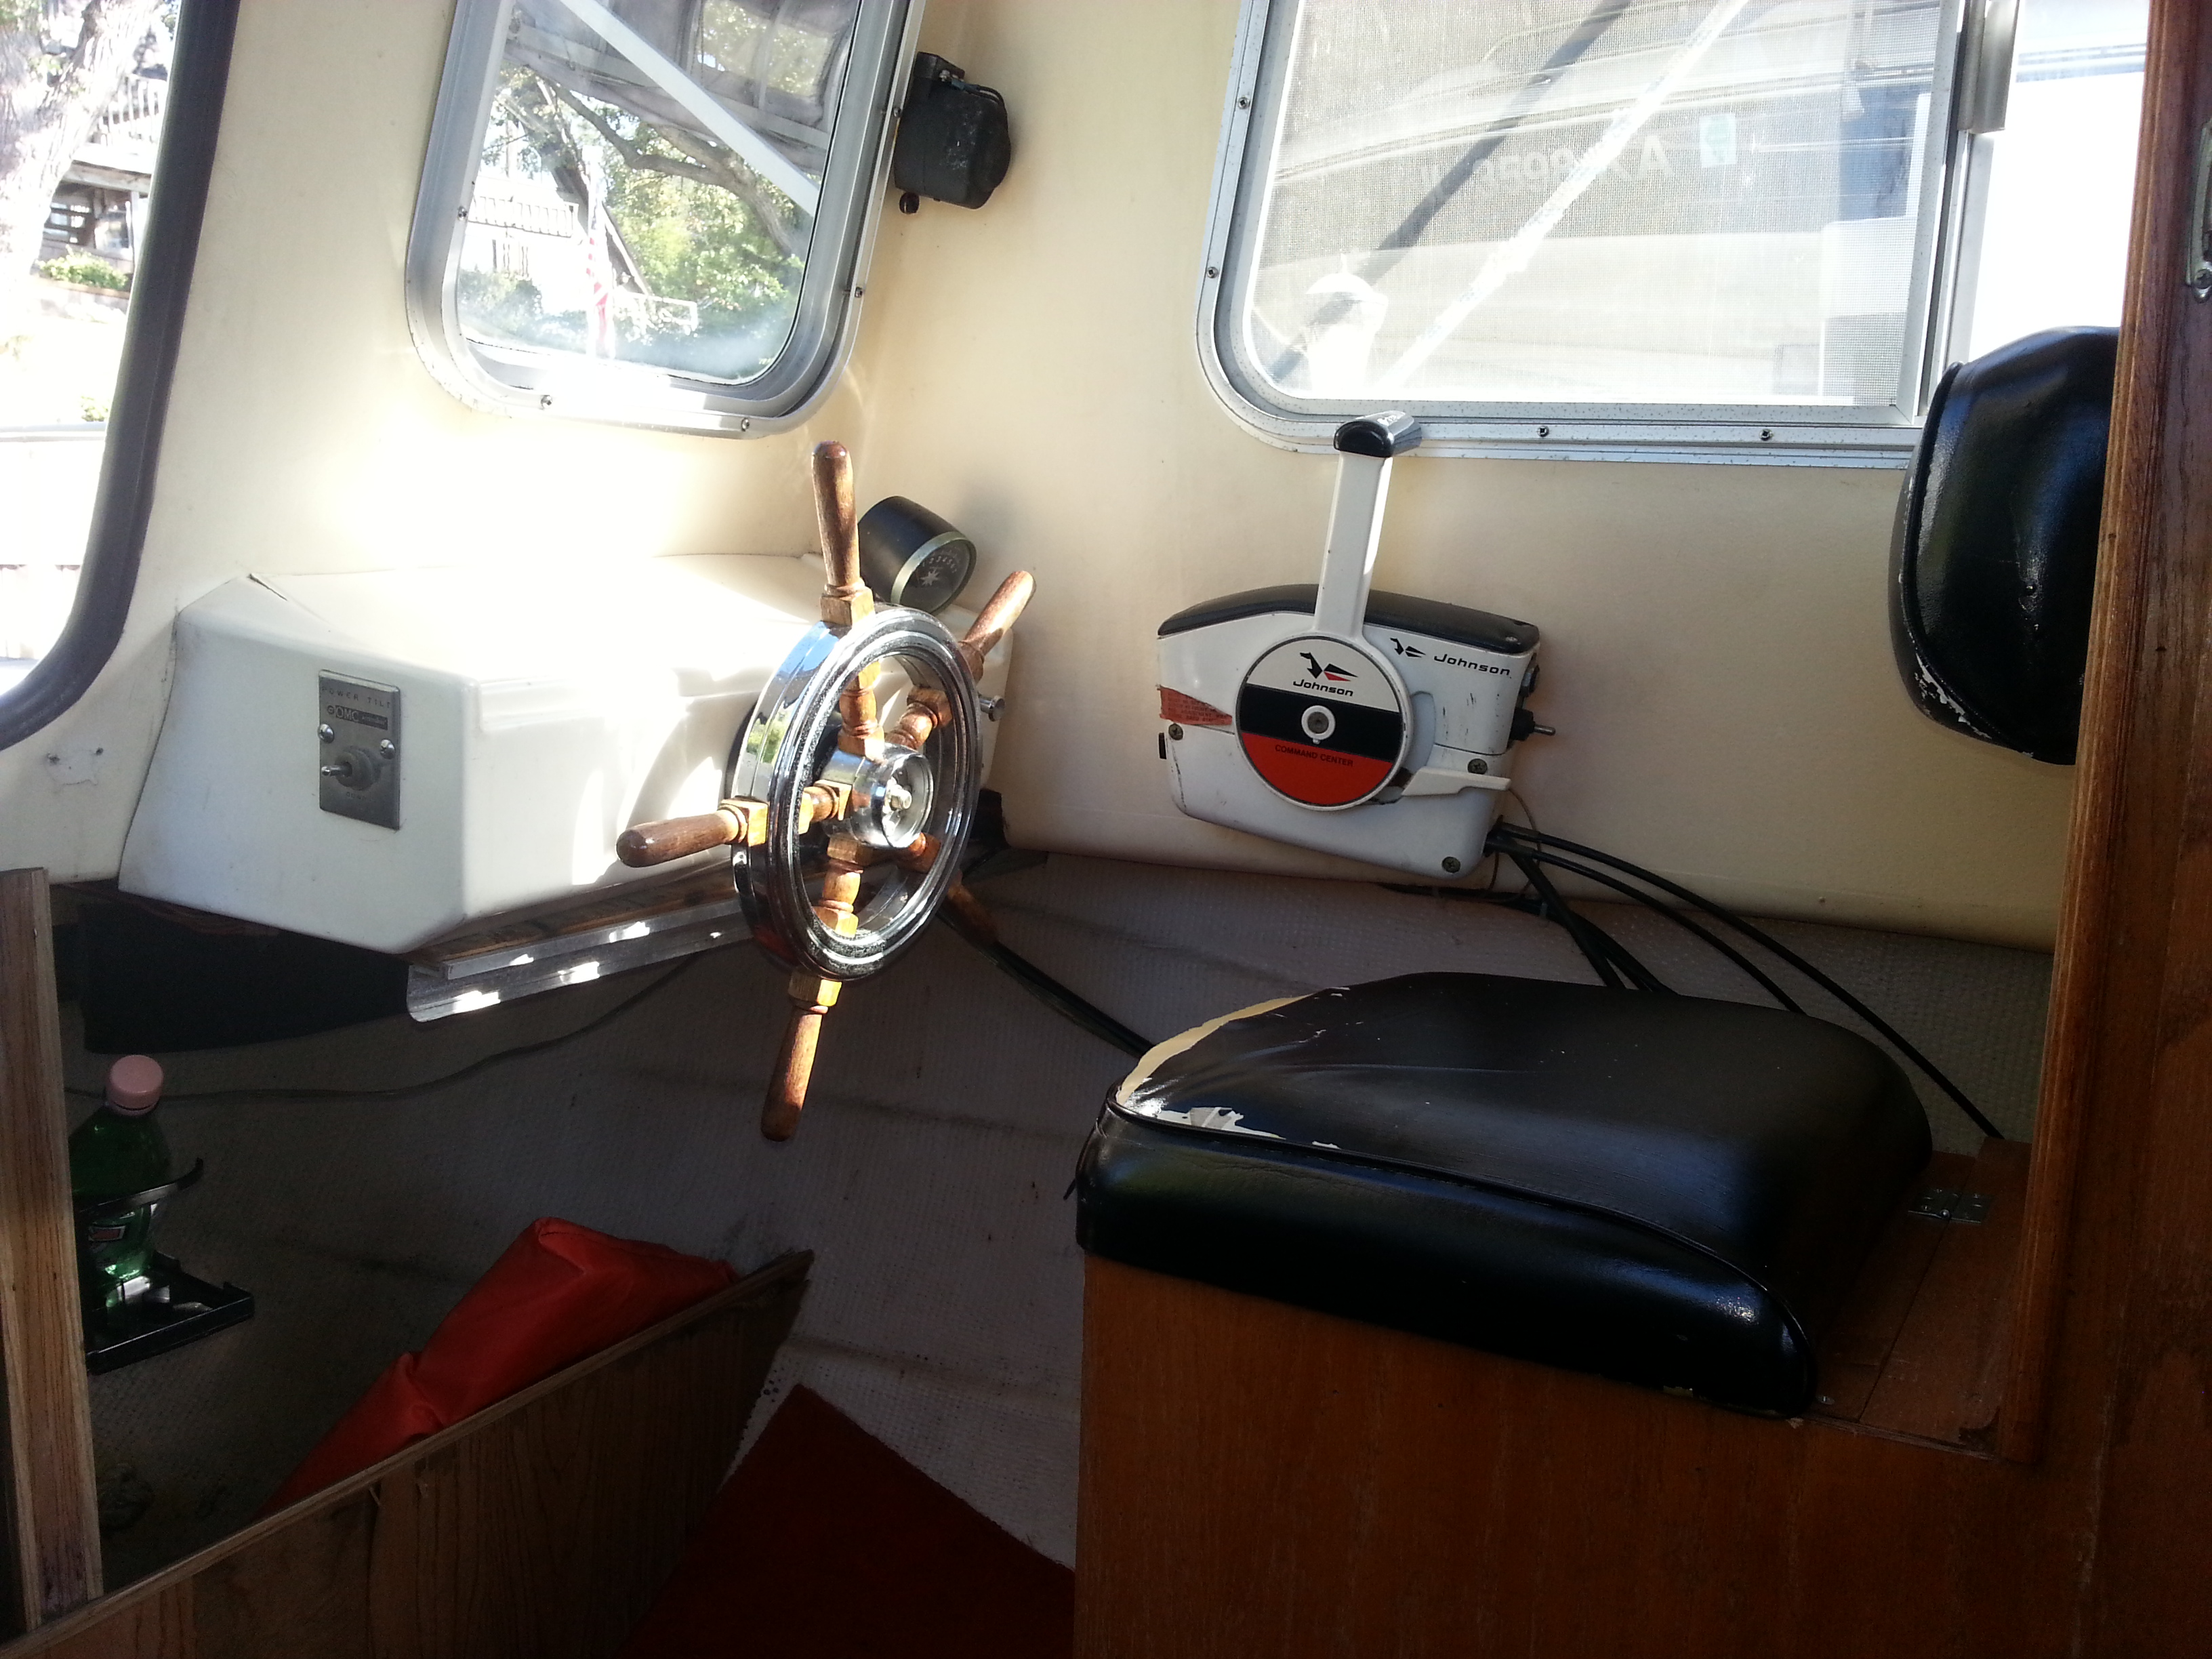
helm, I elected to use my saw-zall to remove it and rebuild a new one. The
old one never was level anyway. Months later, and after re-wiring the
entire helm, it it looking like the Too Cute will be splashed in 2021!
Monday, February 13, 2023
I guess I need to start putting the year on the posting, more years have passed.
In the past 7 years, we lost two great friends. Not only were Gary and
Brian fellow Hobo owners, they were great friends as well.
We moved from Antioch, and we are now solo with the Too Cute, the last floating
Hobo in the Midwest that we know of.
We are fortunate, we are only 15 minutes from the lower Fox River, where we
scouted it with our Jet Skis first, and know the Too Cute will be happy
here. While the water is lower than the Fox up north, remember the Too
Cute draft is only 12" - yes 12"!
With Covid ramped, I kept my course with my company to keep that afloat and did nothing
to the Too Cute. Now with the new world, company doing fine, things are
getting back to the new normal and on weekends working on the Too
Cute.
Oh our new neighborhood has many links to Michigan Tech, two of our neighbors have deep ties to the UP, our lot looks like something off or Route 41 in the UP and we have great neighbors.
Back to the Too Cute, 2022 we
had many new things to talk about.
New paint on top and bottom, anti-skid on the deck, and Too Cute is once again
on the water!
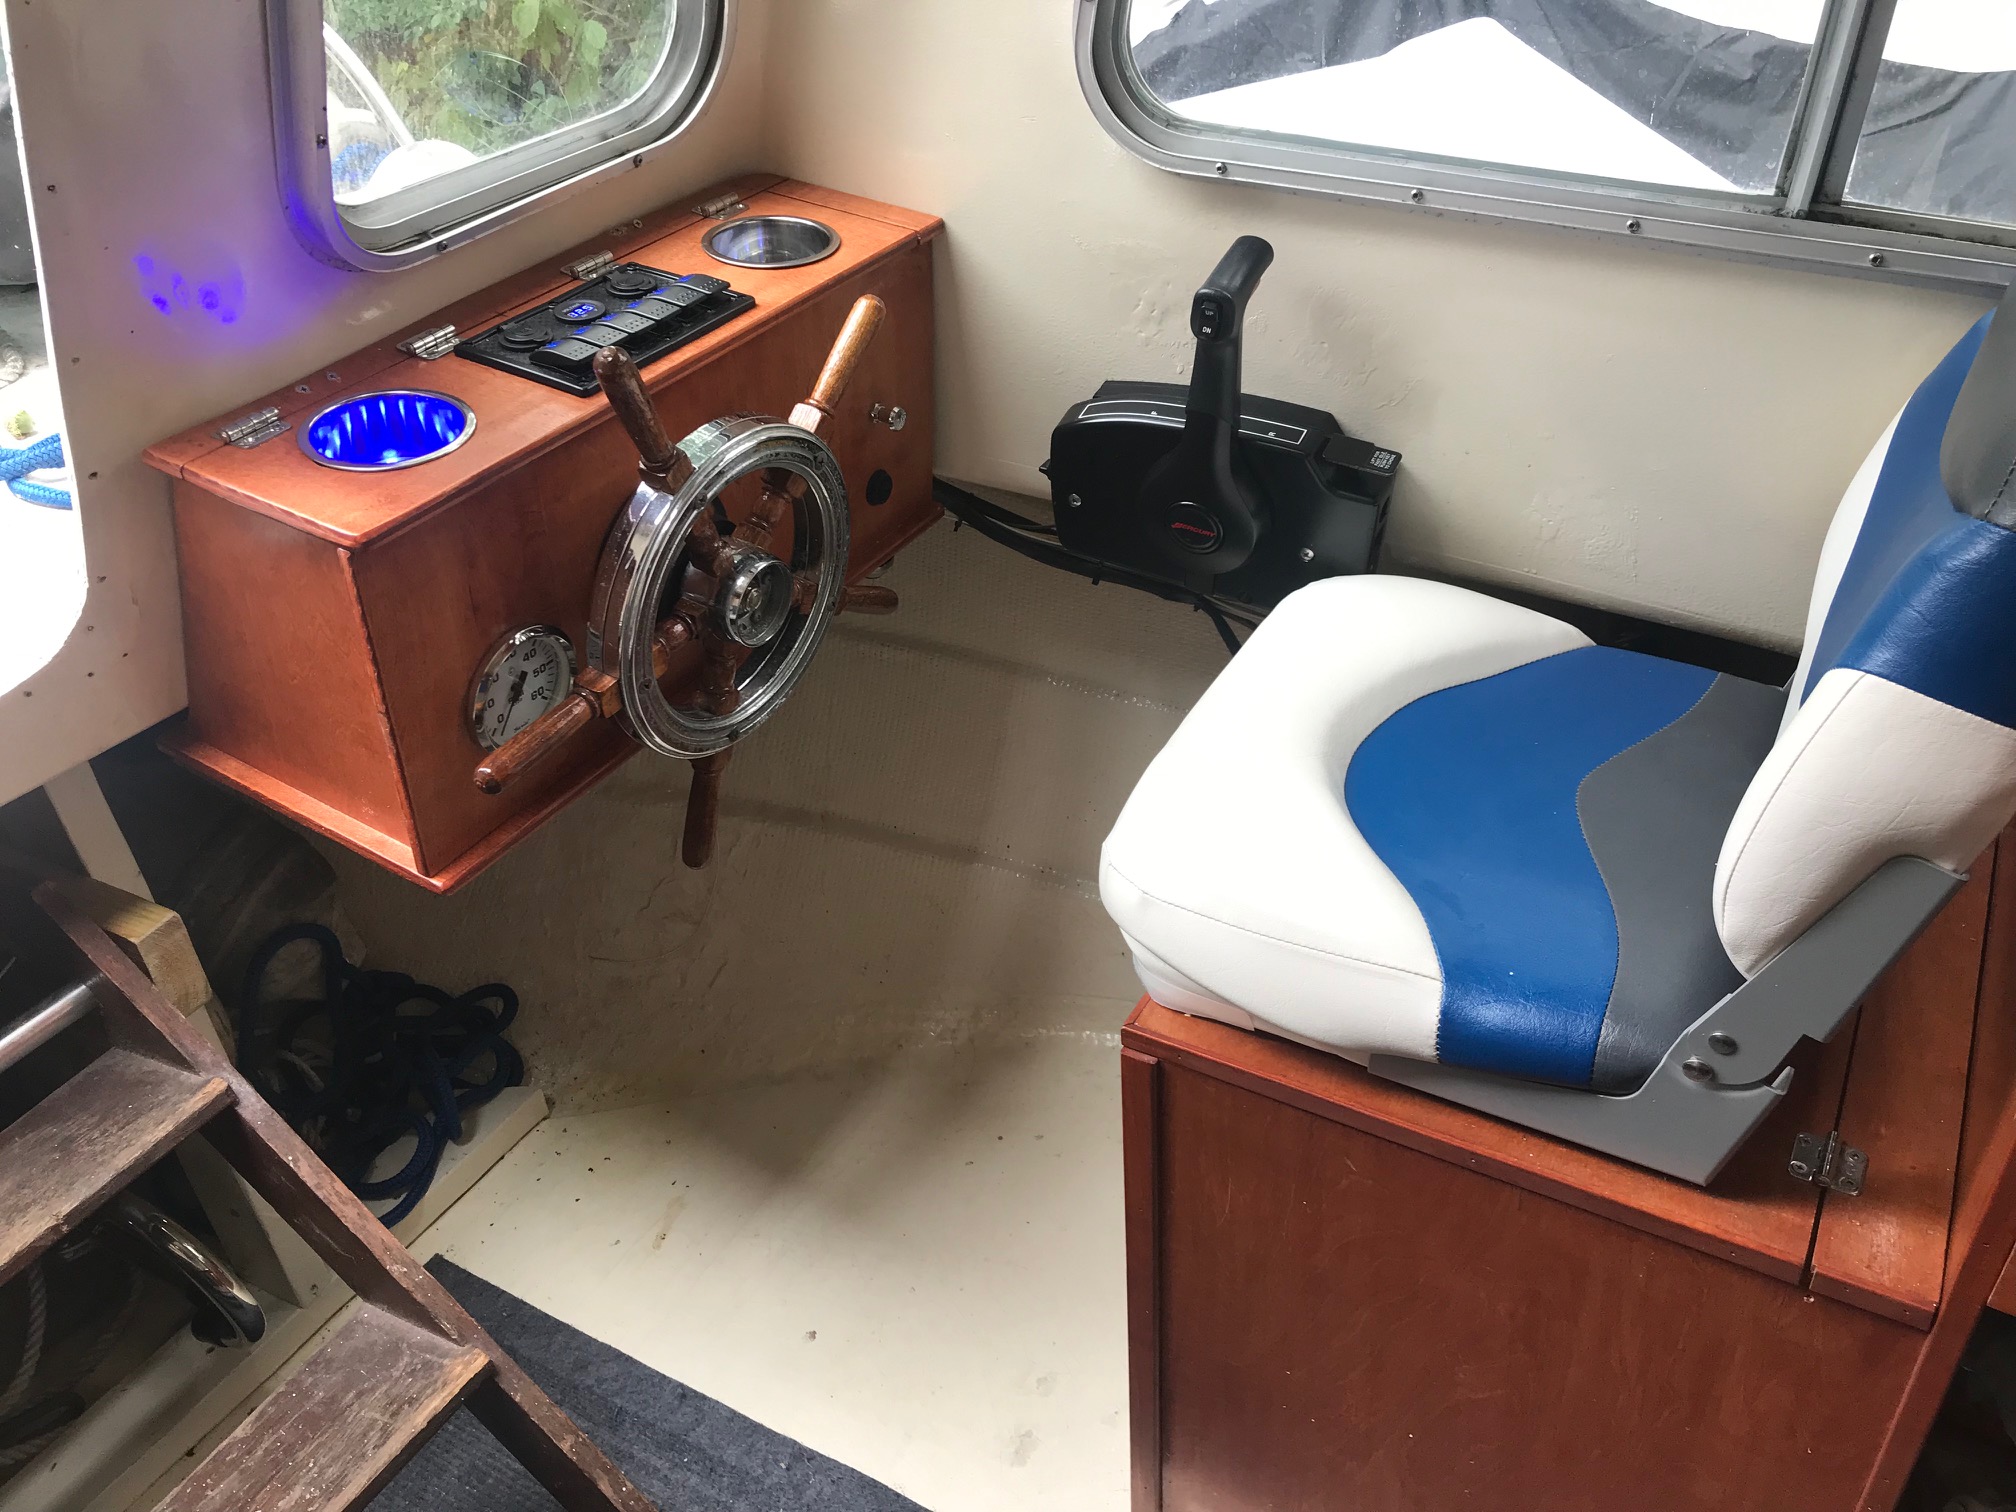
We slipped back at the Chain of Lakes (remember above?), Rebuilt the helm, see
below.
Through many many prop swaps, I
finally achieved WOT with the prop. The final prop selected???
12.5 x 8, no cup, and at 11MPH, we are on plane @ 6,500RPM
A special thanks to the help of Mercury Marine for so many calls and questions!
We are looking forward to boating in 2023 back on the Chain. Maybe see you
there?
Oh, if you want to send me an email on any of this, send to frank@electronicinstrument.com